A guide to use WODconnect as Rx'd.
We are here to help you. What are you looking for?
Documentation in Finnish | Ohjeet suomeksi
1. Athlete
2. Coach
3. Gyms
- 3.1 Creating a gym
- 3.2 Basic settings
- 3.3 Gym feed
- 3.4 Members
- 3.5 Booking system
- 3.6 Seminars
- 3.7 Widgets
- 3.8 Billing system

1. ATHLETE
For an athlete, WODconnect is a tool that makes following training progress easy and enjoyable. It shows what to work on next (workouts, skills, strengths) to become a better athlete. It’s a place where you can communicate with your gym community and even get coaching outside the gym. It also manages all your gym related bills and bookings. Main functions for the athlete are gym feeds, personal journal and workout history, public workouts and workout lists, class and seminar booking and notifications.
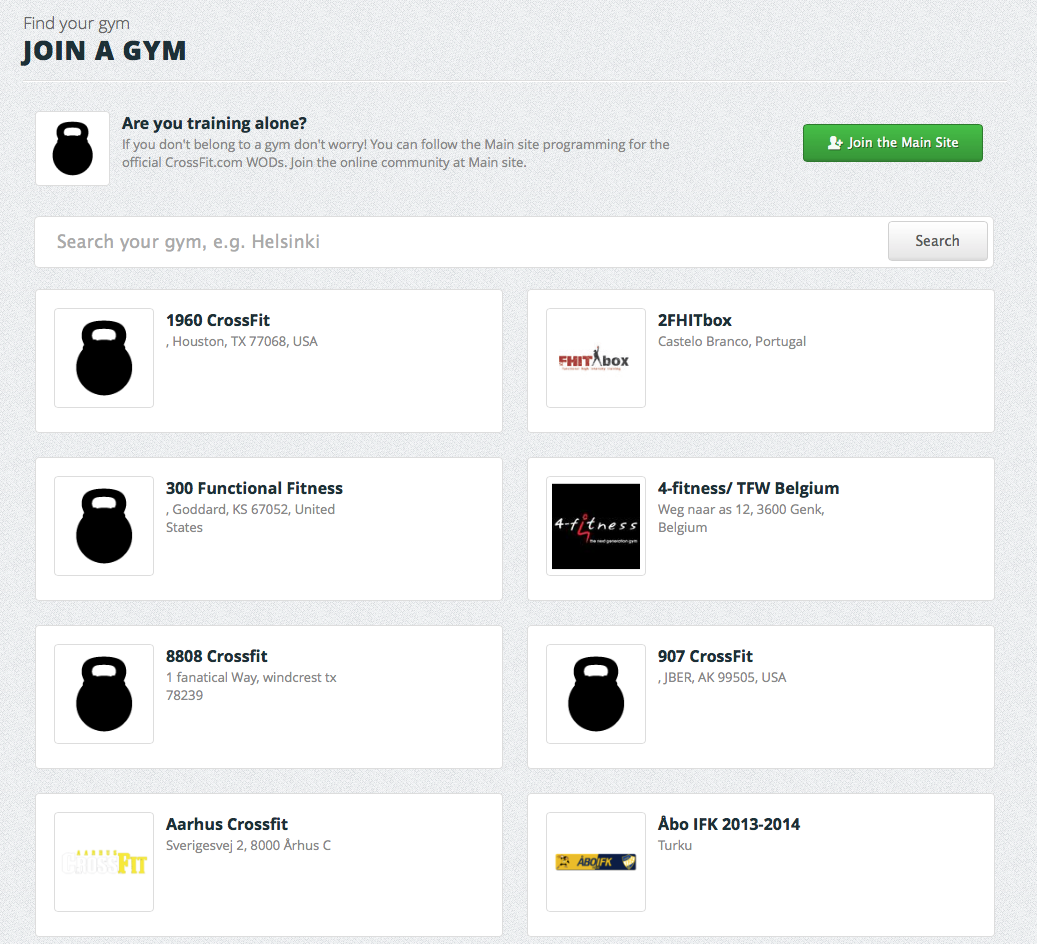
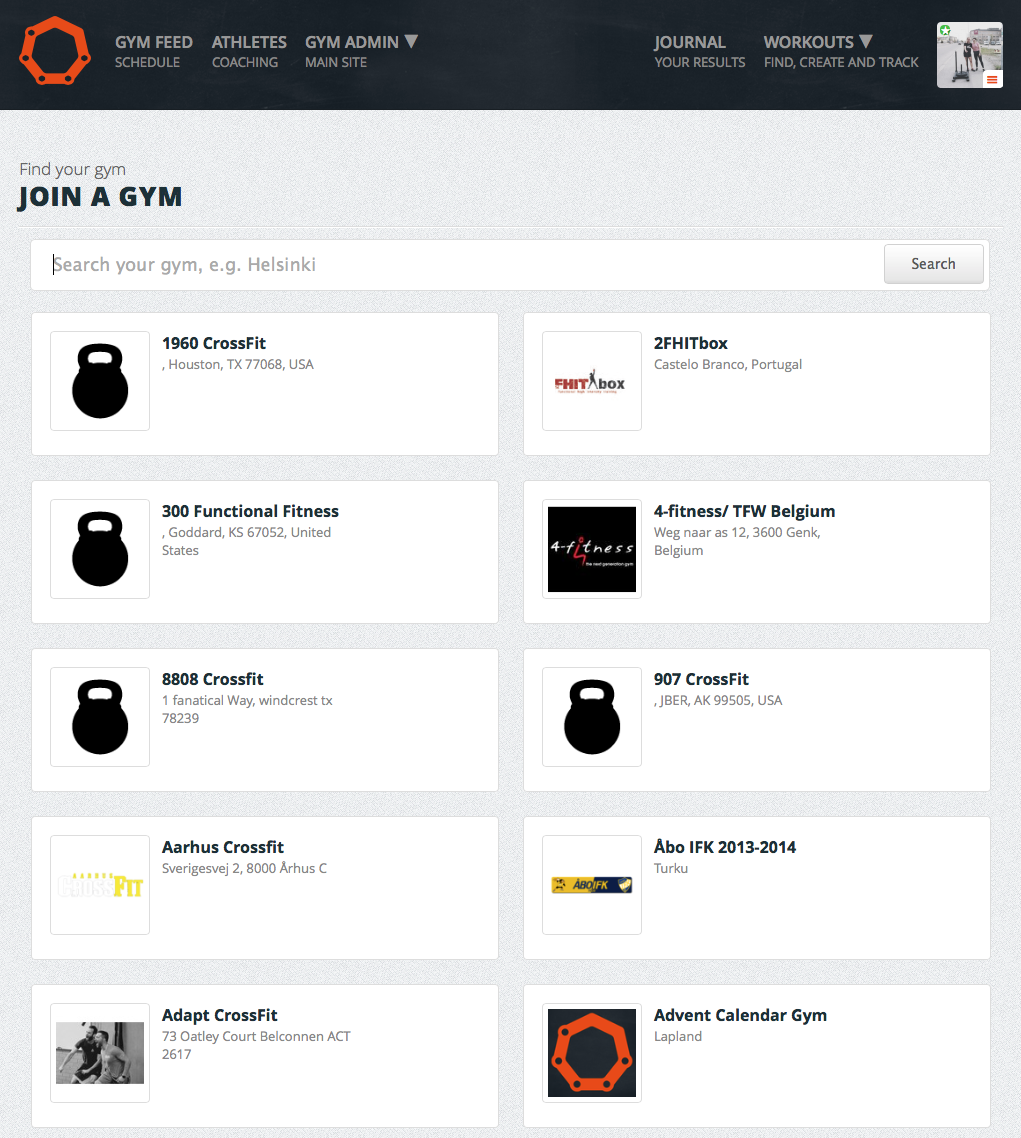
1.1 Gyms
Gym search helps you to find gyms by name, city, country etc. In principle, you can join any gym you want, but some of them need to accept your request before you can see their feeds. If your gym is not yet on WODconnect or you are training alone, you can always follow the Main site programming, create own workouts or even create your own WODconnect gym and programming. The Main site programming comes from http://crossfit.com.
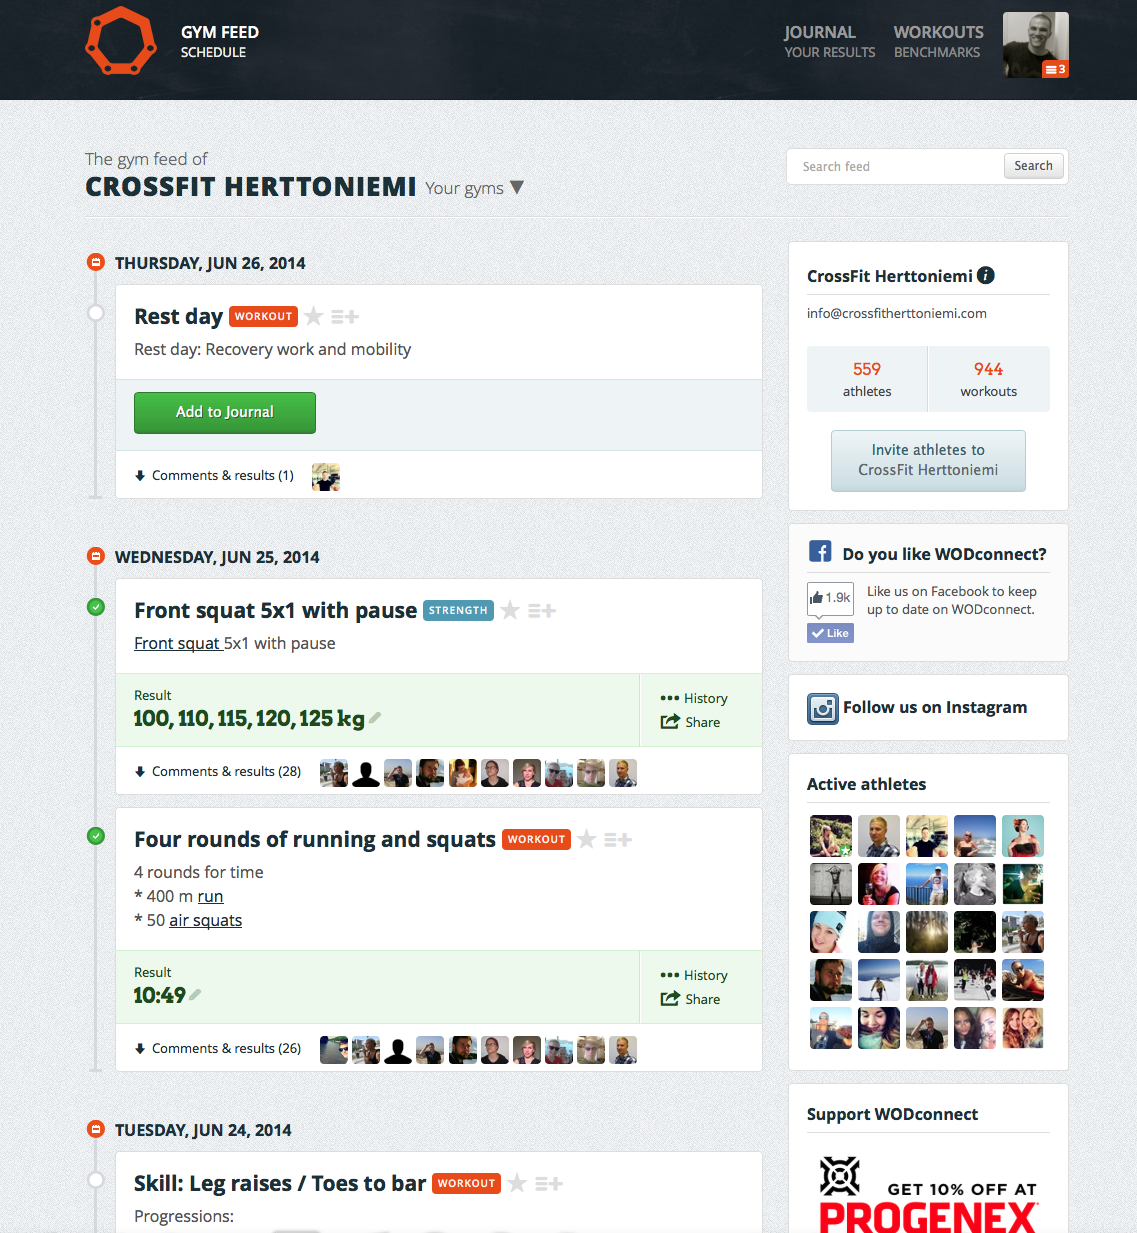
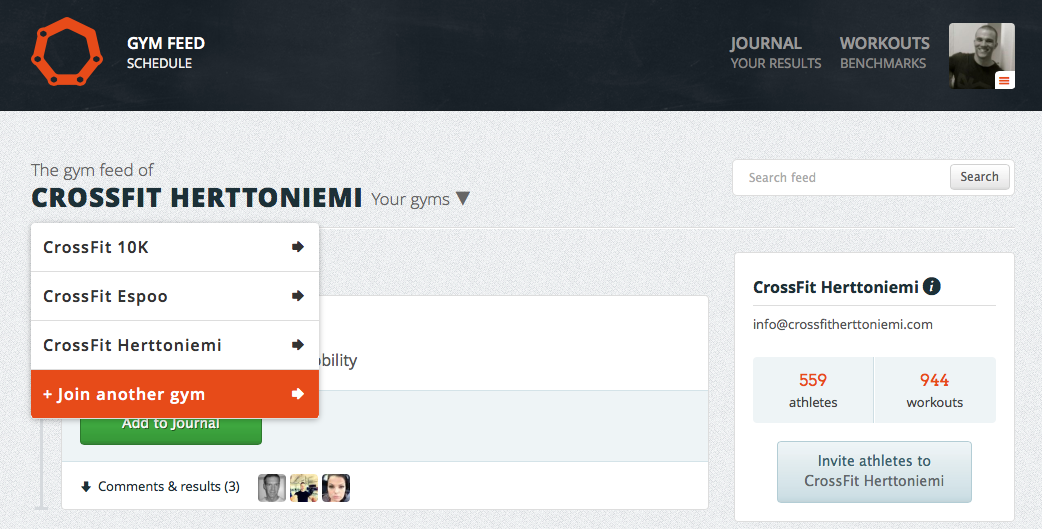
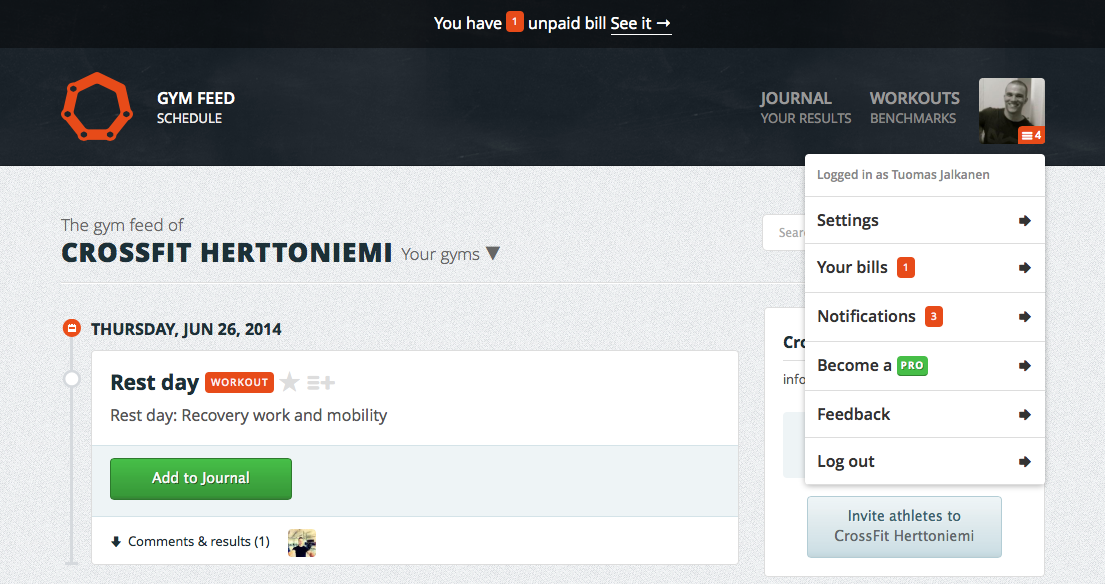
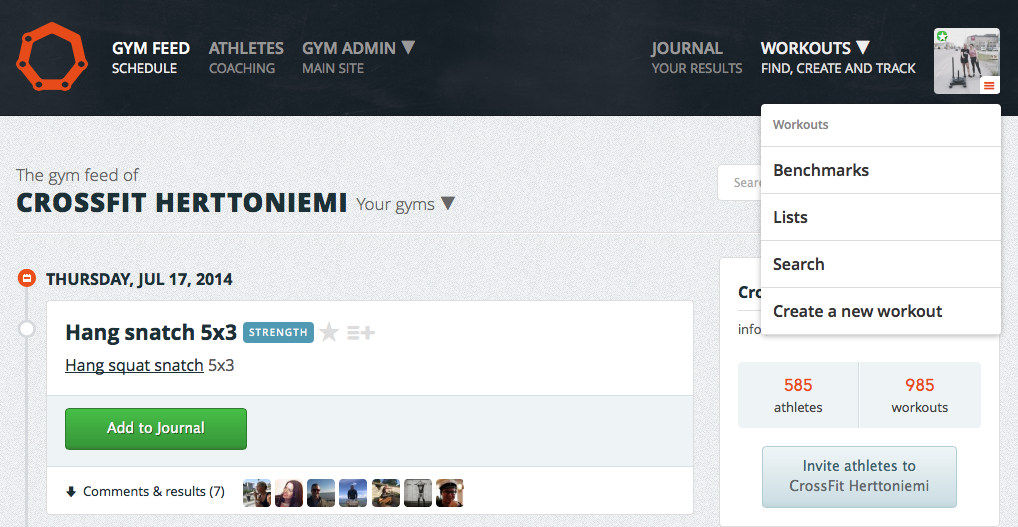
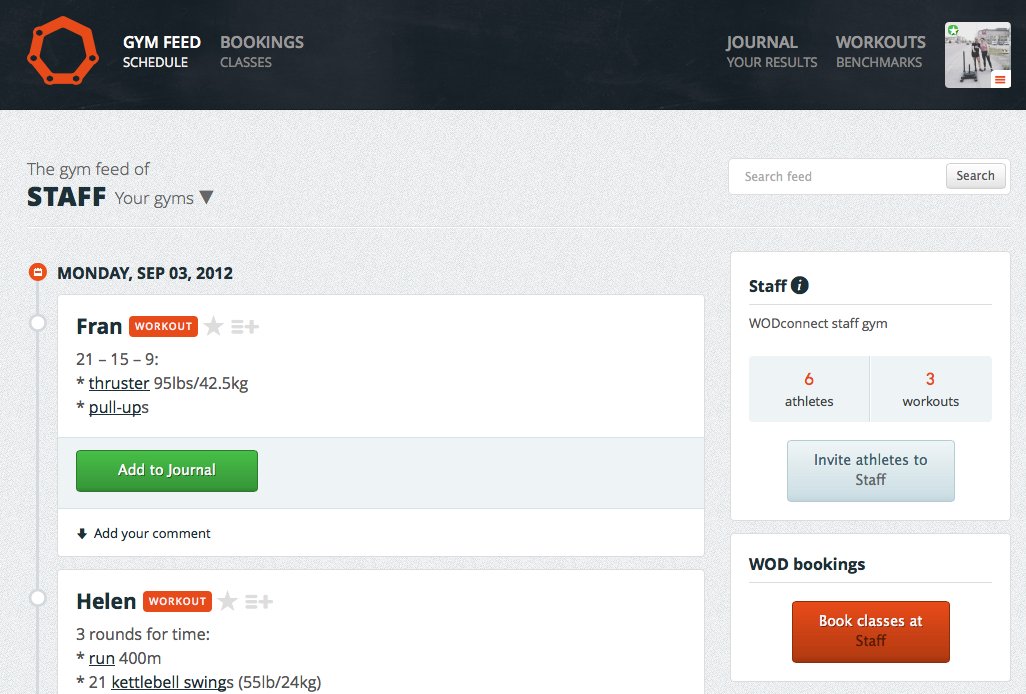
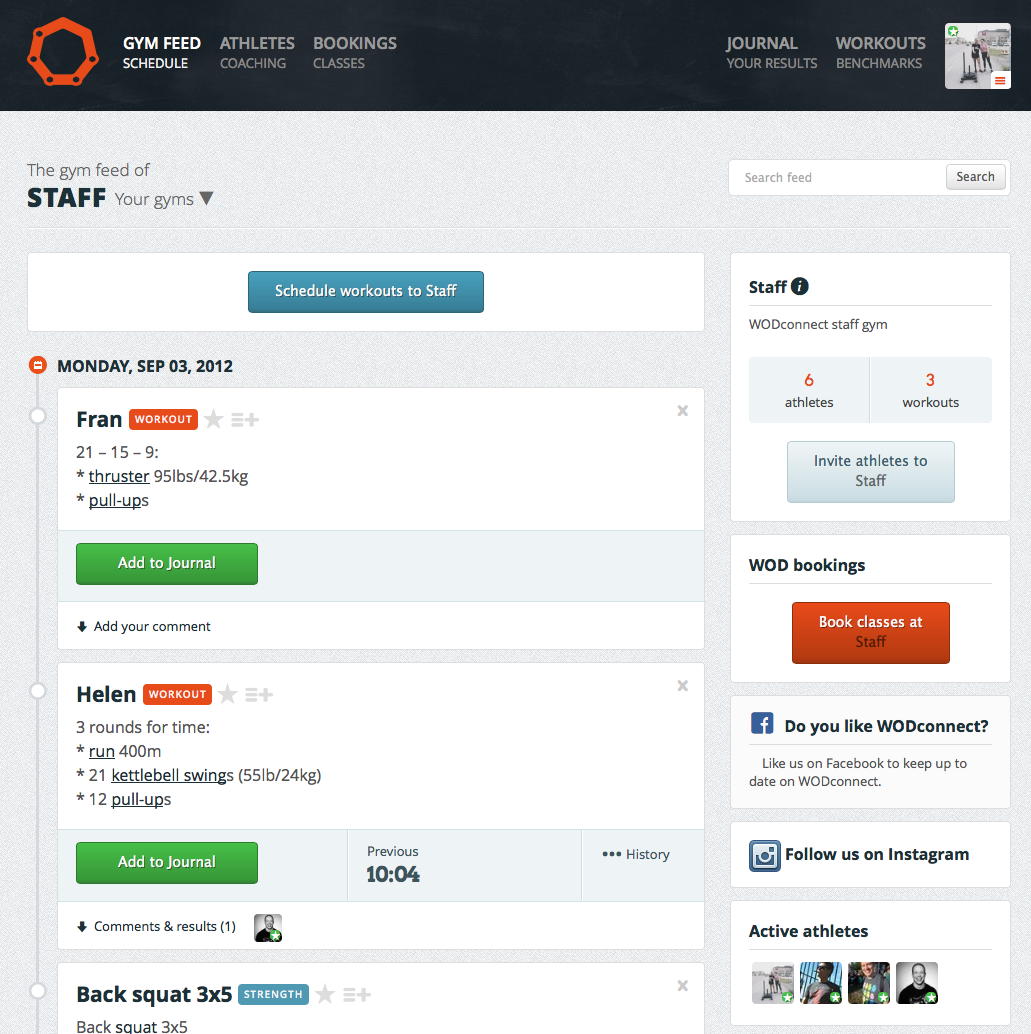
1.2 Gym feed
When you join a gym, you will see its gym feed. Gym feed is the page where a gym publishes its programming, and where its athletes mark their results and socialize around them. As an athlete in WODconnect, you have the possibility to follow multiple gyms feeds. However, as it is recommended to follow only one programming at a time, you have one main gym feed, which is the page where you land on when logged in. You can still be a member of several gyms and search for new gyms whenever you want.
1.2.1 Adding results
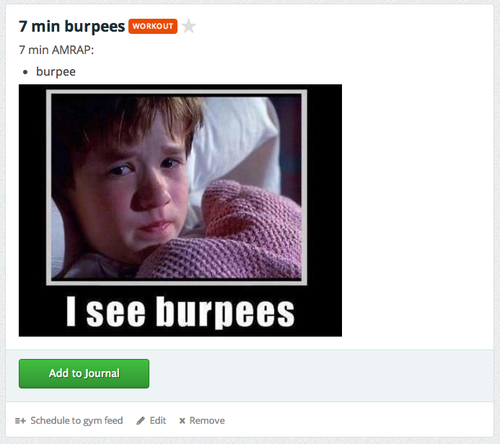
Adding results is easy. Your gym’s workouts are already there, you just have to click “add to journal” when you have completed a workout.
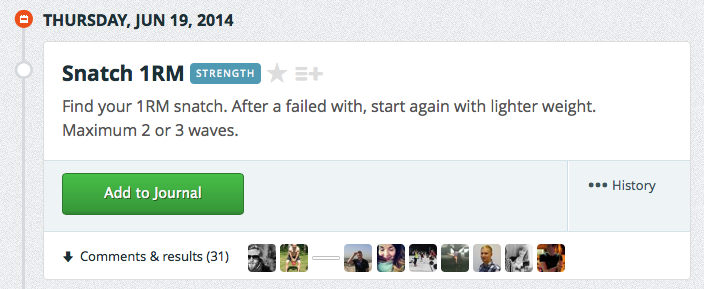
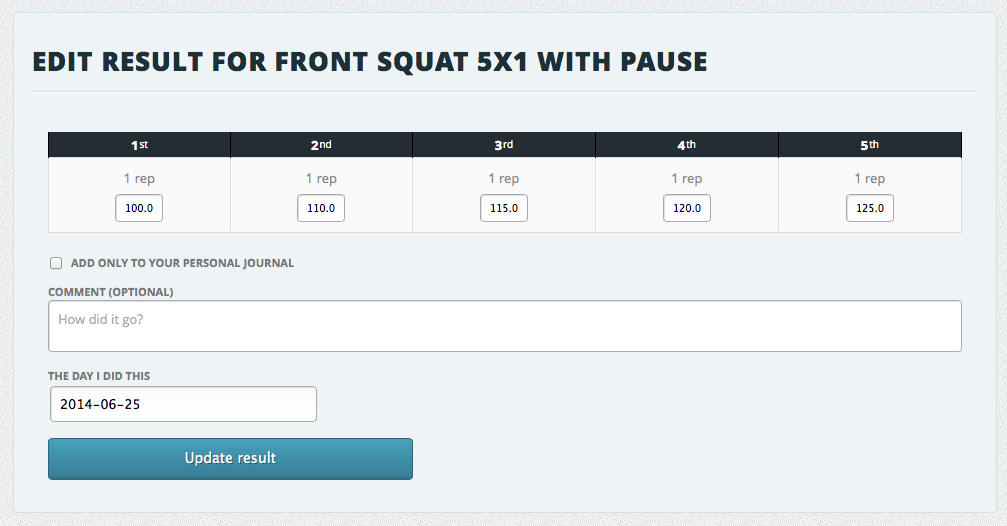
Put in your result and add comments if you have something to add. At least when analyzing your progress, it is interesting to know details behind every result – those comments can explain a lot of your development. The comment box is also a good place to announce your personal records.
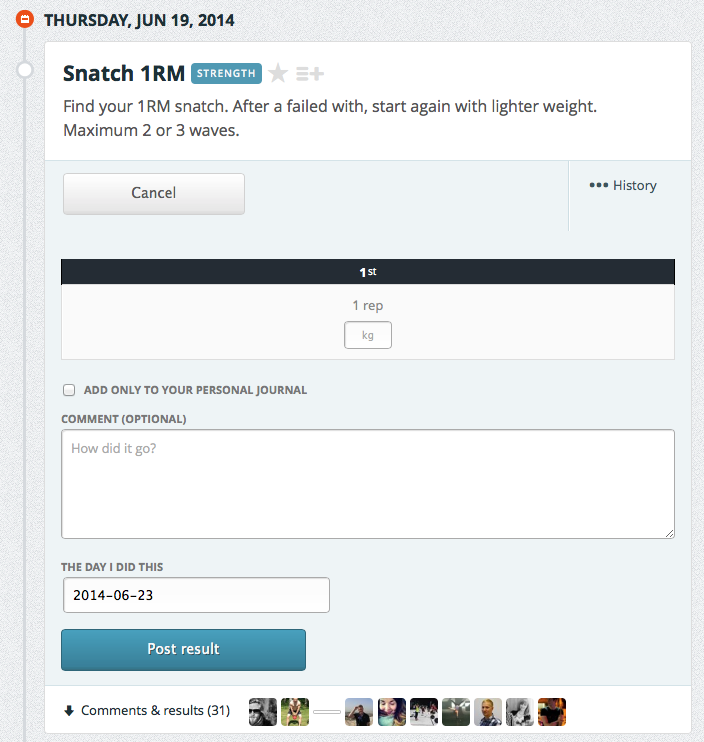
You can choose to add the result only to your personal journal – that way it will not appear on your gym feed and other members won’t see it. Only you and your coach can see your journal. If you choose to post it publicly, other members of your gym will see the result and be able to cheer or comment it.
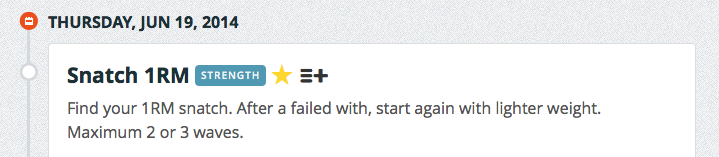
If you want to add a workout as a favourite, click the star icon next to the workout title. You can also add the workout to a workout list by clicking the list icon next to the star. Your favorite workouts and lists will be saved in the “workouts” section (see chapter 1.4).
1.2.2 Commenting & cheering
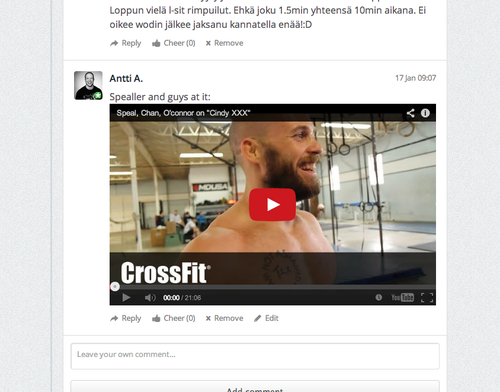
After adding your result, you might want to see how others have performed, what they thought of the workout and cheer them. Click “comments & results” and you will see all their posts and comments.
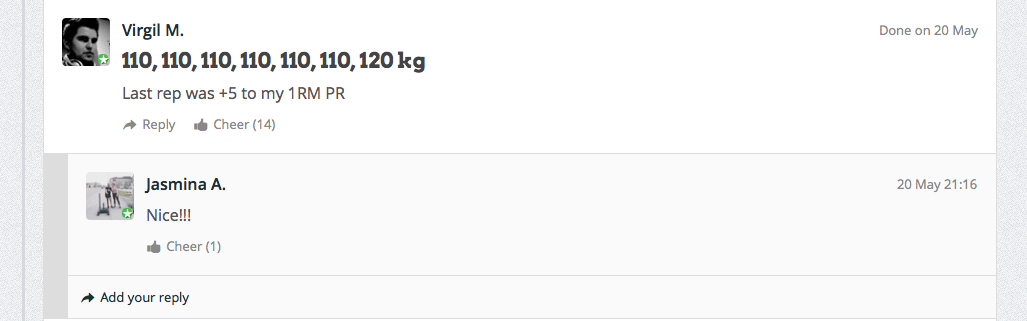
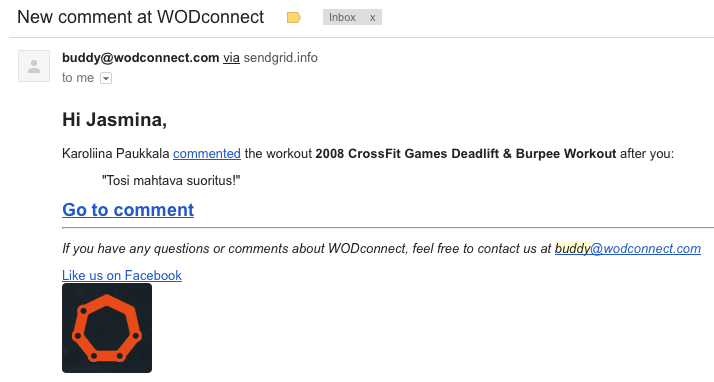
When someone cheers or comments your result, you will get a notification. Notifications appear on the corner of your profile picture, and clicking “notifications” from the dropdown menu will take you to a list of all your notifications.

If you choose so, you will also get a notification email when someone comments on your result. In that case, go to settings and turn on the notifications. More about notifications in chapter 1.7. To spice up your comments, why not add a photo or even a video? Do that by adding the photo url, Youtube or Vimeo link to your comment. This is also a great tool for coaching and giving tips after a workout. Photos and videos can be added to original workouts as well, more of that in chapter 1.4.2.1.
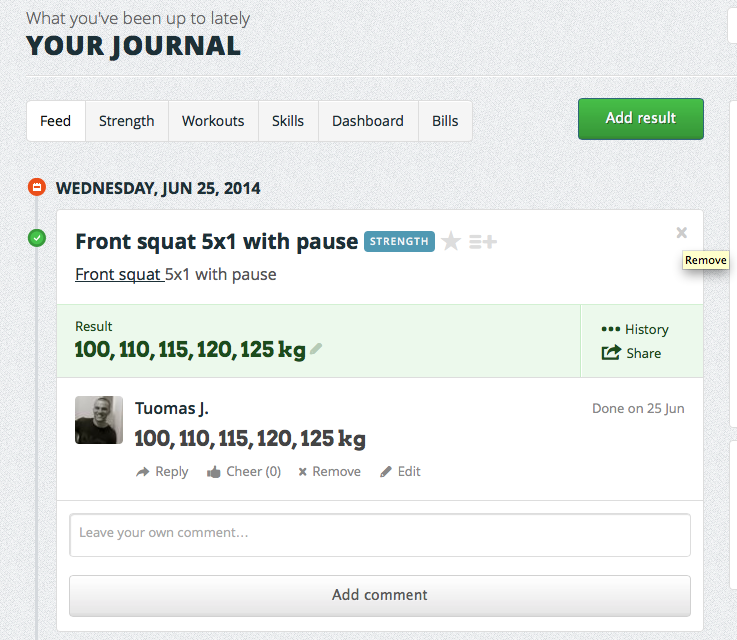
1.2.3 Editing results
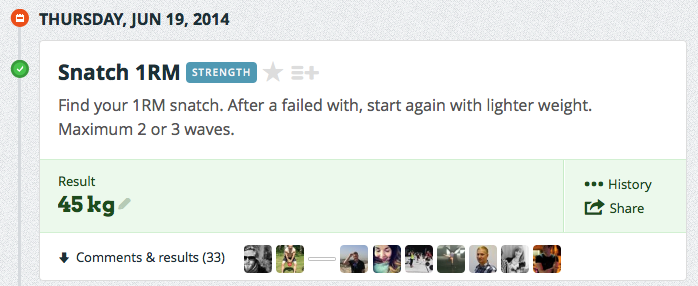
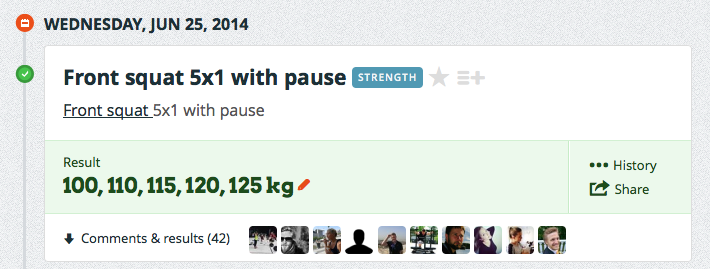
Editing results happens in your gym feed or journal. Click the pen icon next to the result, it will take you to an editing view.
Do the changes and update the result. The updated result will show in your gym feed and journal.
1.2.3.1 Deleting results
When you have made a mistake or otherwise want to delete a result, go to your journal feed. Click the ‘x’ in the upper right corner of the workout, and the workout will be deleted from your journal. At the same time the result will disappear from your gym feed, but the workout will remain there, if you want to add a new result to it later.
1.3 Journal
All the results you mark done, will be saved in your journal. When adding results in your gym feed, you can choose to not publish them and save them only in your journal. Journal is also the place where you can add own workouts, and this way every workout you have done can be seen in your journal. Only you and your coaches have the right to see the contents of your personal journal. In addition to your workouts, the journal includes all your paid and unpaid bills and if you are a pro user, there is the dashboard with strength reports and information about your activity.
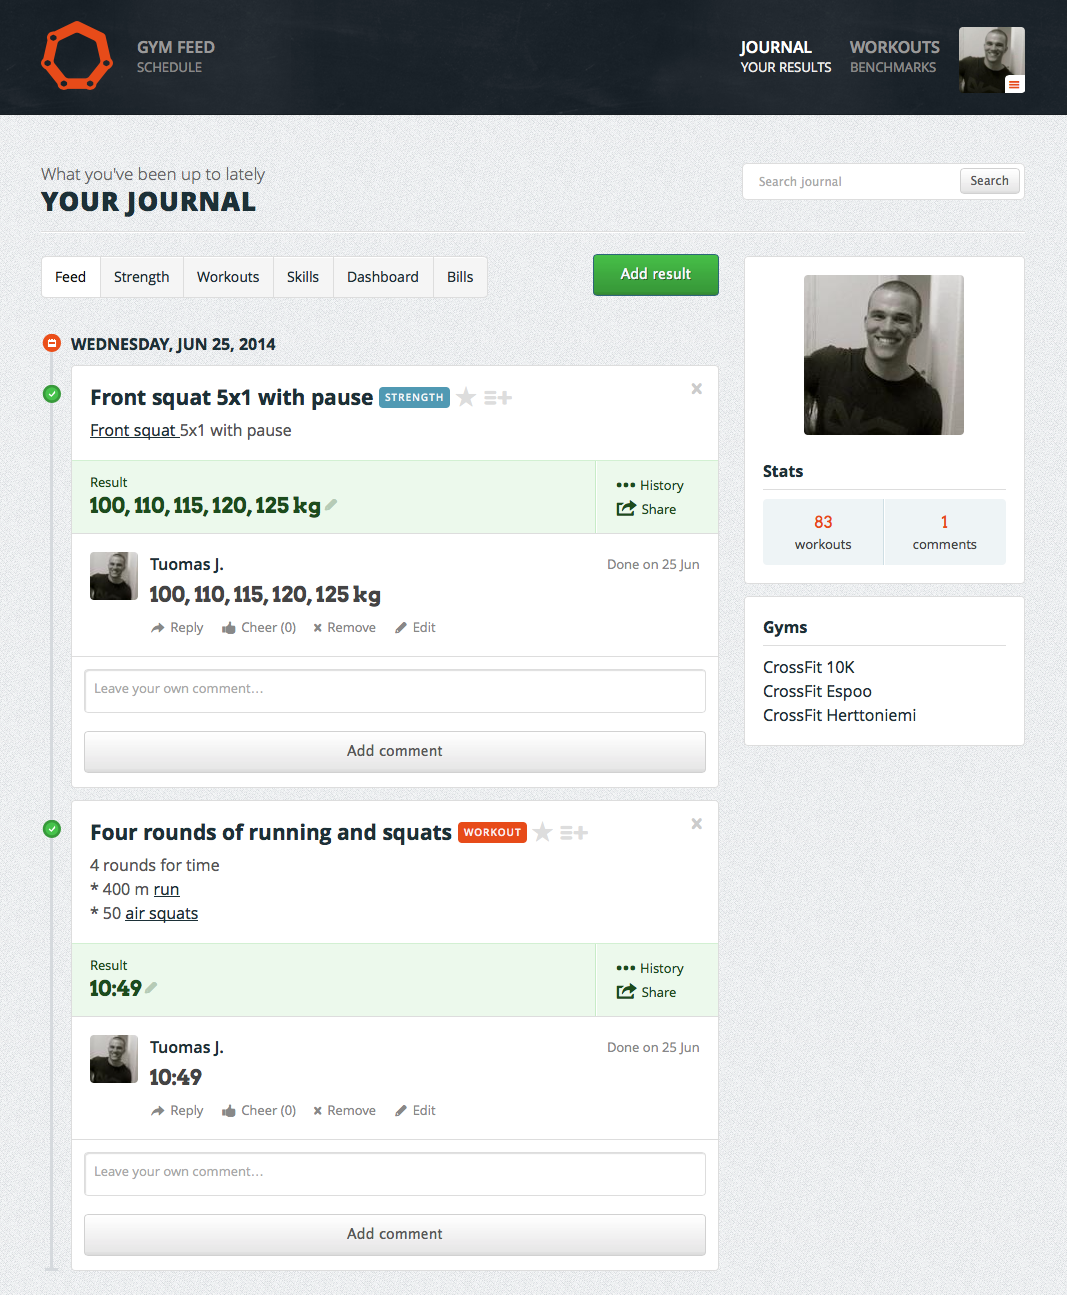
1.3.1 Journal feed
The main view in your journal is the feed, where you can see all the workouts you have done; the ones from the gym feed as well as your own workouts. It looks very much the same as the gym feed, but the contents are a little bit different (compare screen shots of chapter 1 and 1.3). Workouts created by yourself will show in the journal feed only. The journal feed shows only your own comments and your coaches comments, if they have commented in your journal. Results from different gym feeds will show in the journal.
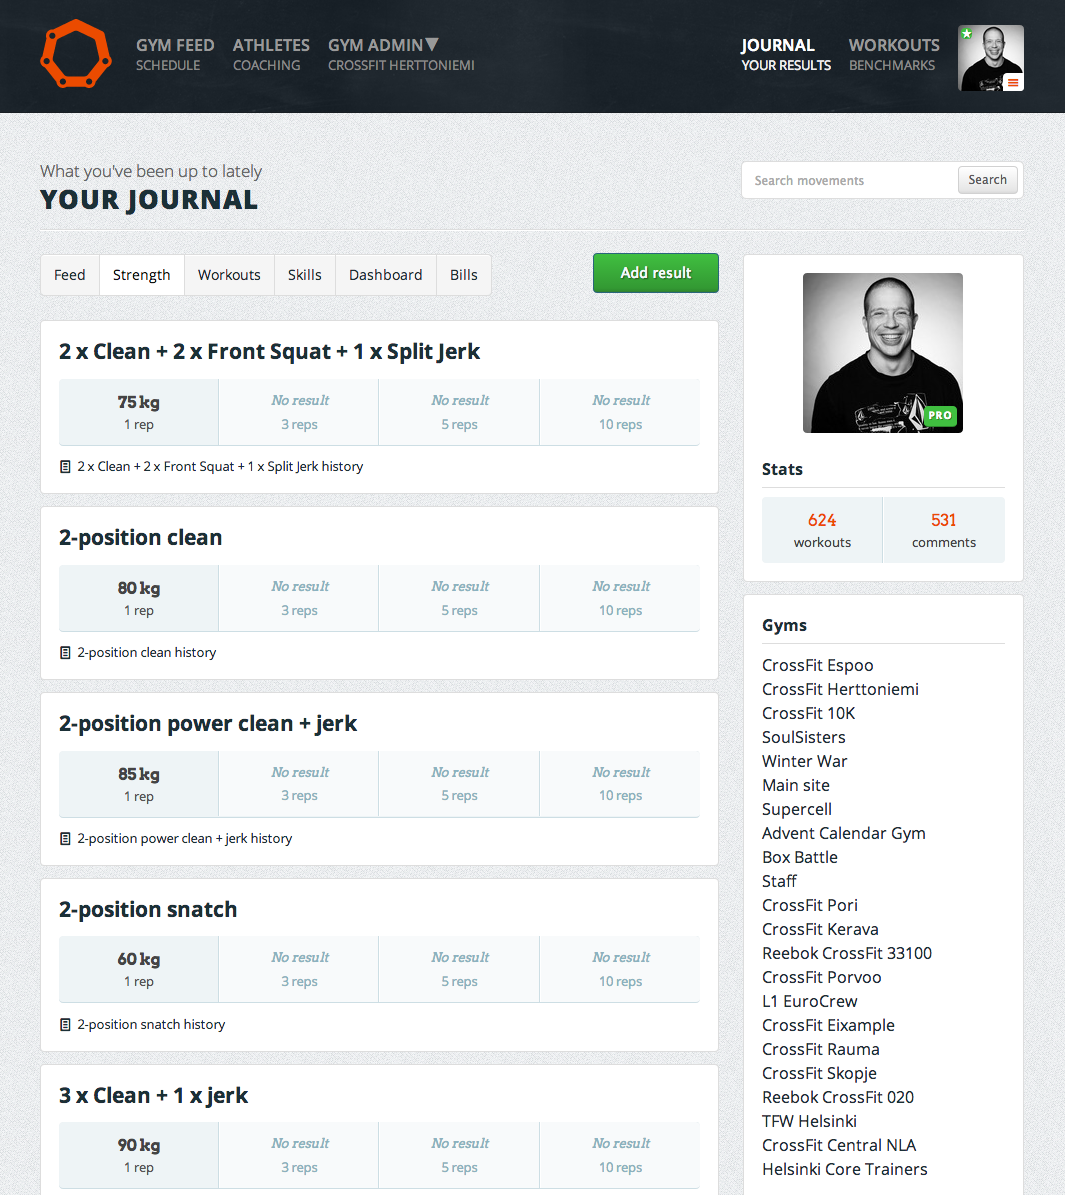
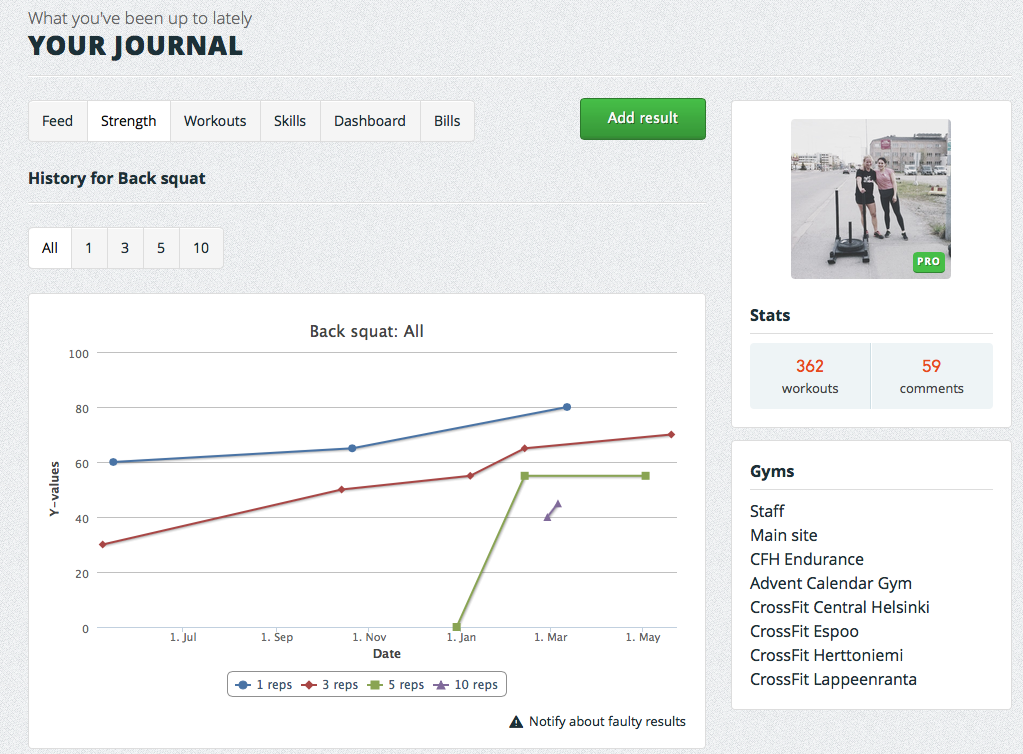
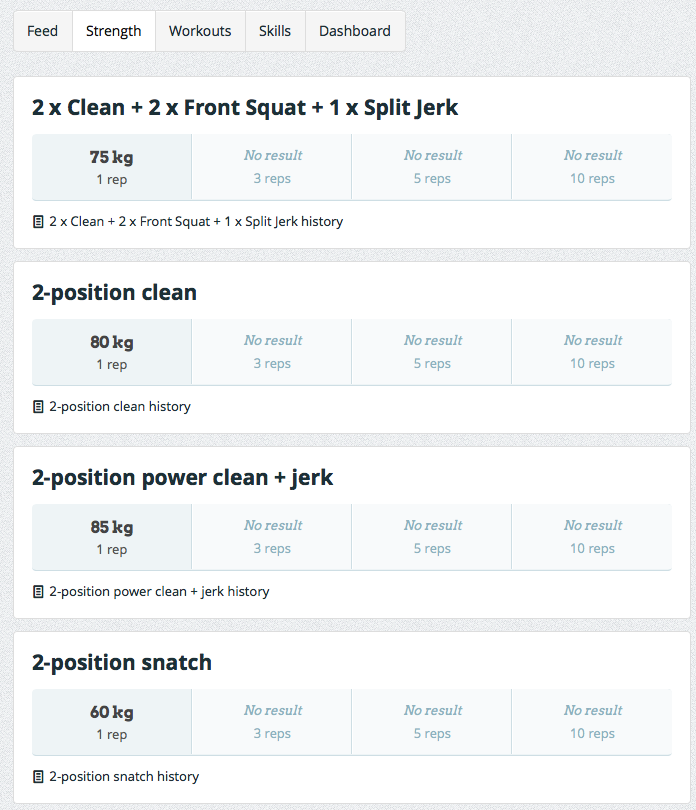
1.3.2 Workout history
The following three parts of the journal are different ways to view your workouts: strength, workouts and skills. The strength part is useful for example when you want to get an overall picture of your strength levels. It shows your strength results by movement and max results for different number of repetitions.
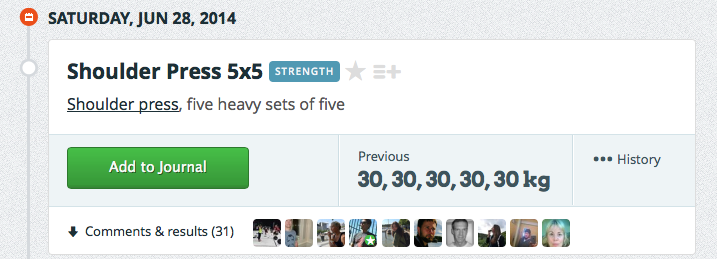
On every workout listed in your gym feed and journal, you see a link to “history”. That is if you have marked results for that workout before. The main benefit of the history is for strength movements and benchmark workouts, as those are the ones you want to compare the most when analyzing your progress. For some workouts the gym feed also show your previous result for that movement, which is useful to see before you go and do the workout without remembering for example the weights you have used before.
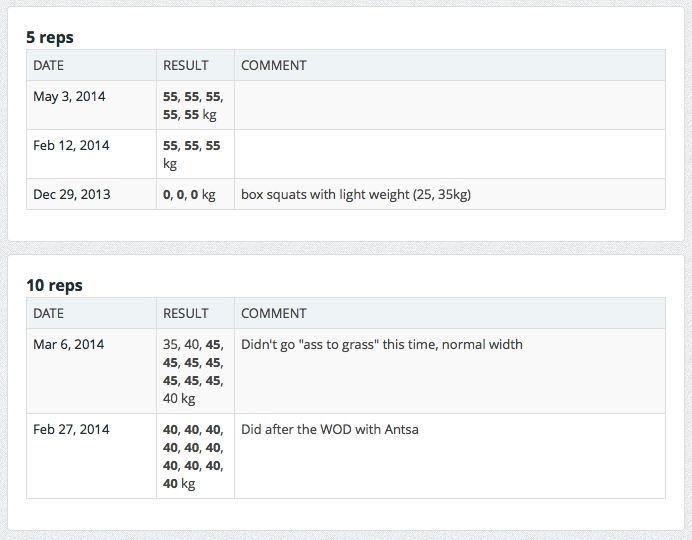
When you go to the history of a movement, you will see all your results on that movement presented in graphs and tables. You will see your all time development divided by the number of repetitions and your comments for each result.
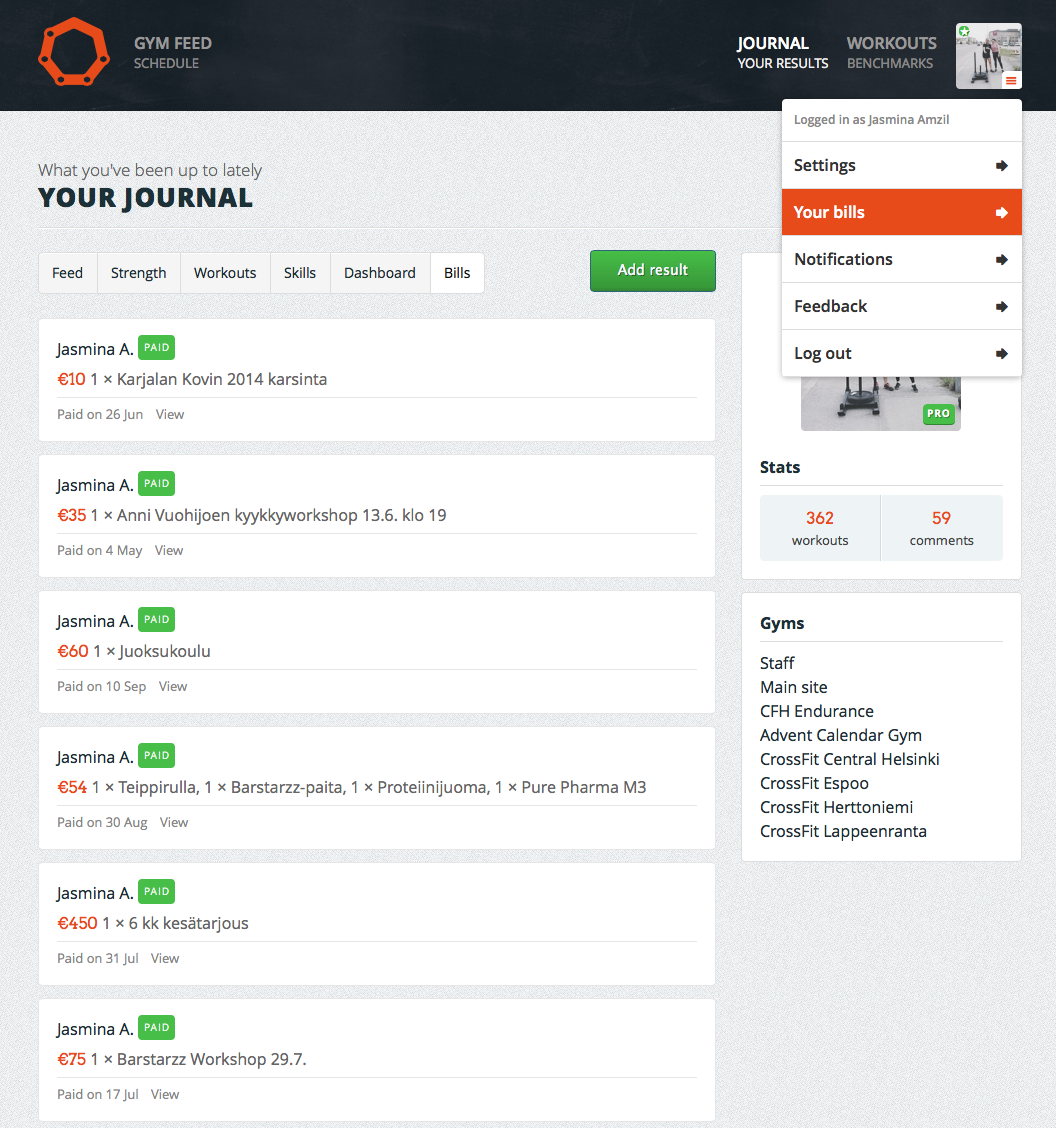
1.3.3 Bills
Then there is bills, where you can see all your paid and unpaid bills. This helps you to remember your bills and keep an eye on your budget. Most common products billed through WODconnect are gym memberships, on ramps, seminars and goods bought from the gym.
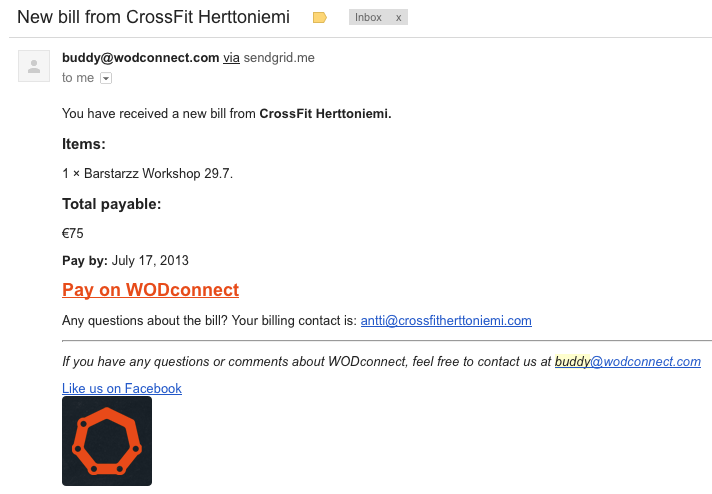
When you have an unpaid bill, a notification appears above the navigation, and you will also get a reminder in your email.


Click “Your bills” from the dropdown menu to see all your bills. Pay an unpaid bill by clicking it and following the instructions.

1.3.4 Dashboard
In addition to the feed, workouts and bills, there is the dashboard, where you can analyze your activity and see volume reports for strength movements. Dashboard is only available for pro account users. Also your coach has to have an active pro account to see your activity curve and reports. More about the pro account in chapter 1.8.1.
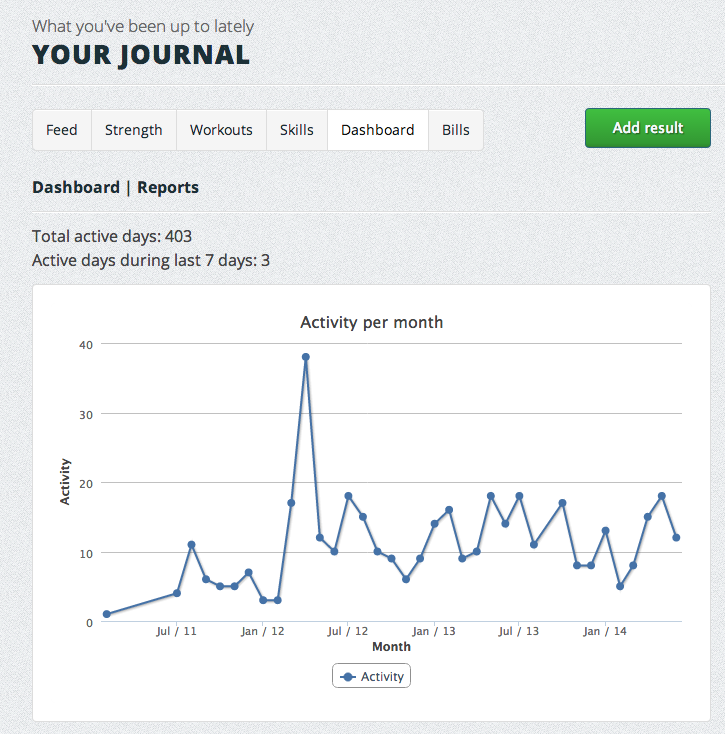
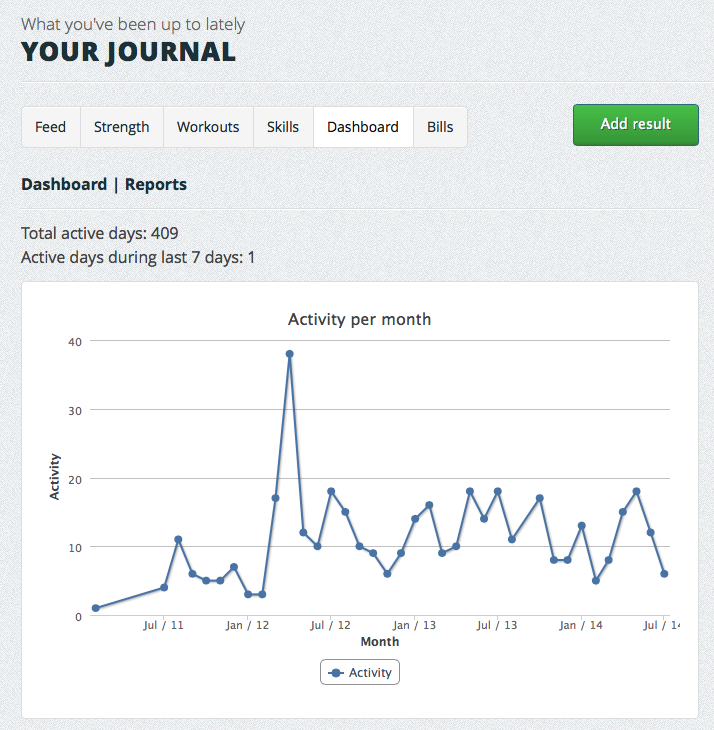
1.3.2.1 Activity curve
The activity curve shows your activity from the first day you have marked a result to WODconnect, until this day. Your activity is calculated monthly. This is the first version, and we are currently working on a more comprehensive activity tracking tool, so stay tuned!
1.3.2.2 Reports
As an athlete you can see how much volume you have done for the selected movements in a selected time period. It’s an handy tool to see how you’re training is going and if you are actually training your weaknesses or strengths.
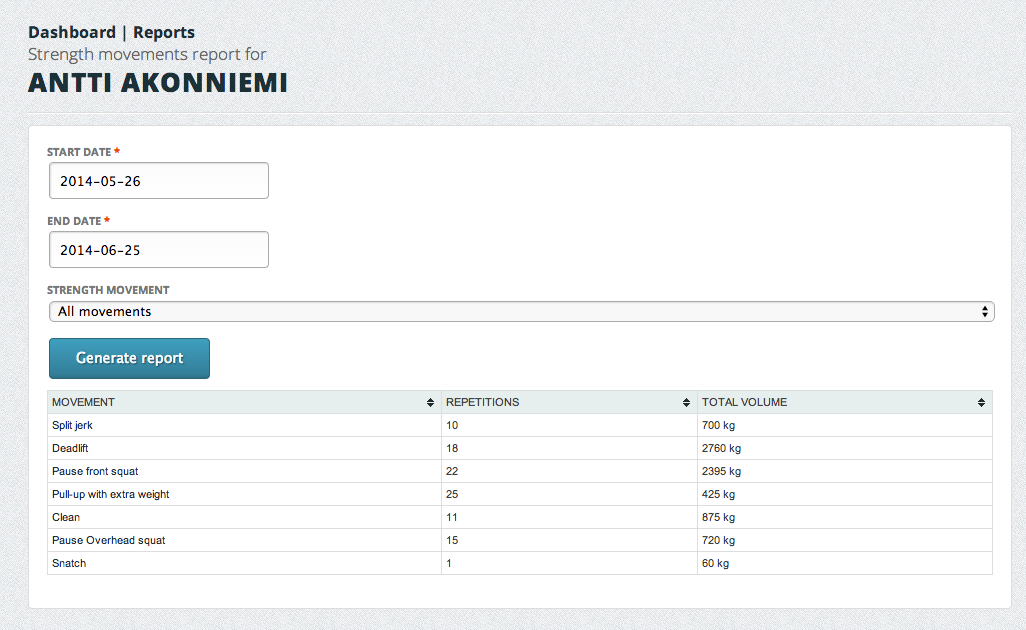
You can access this feature from your Journal, just click “Dashboard” and then “Reports”. This feature is also available for coaches who have purchased a pro-account. Coaches can access this feature from athlete’s Journal.
1.4 Public workouts
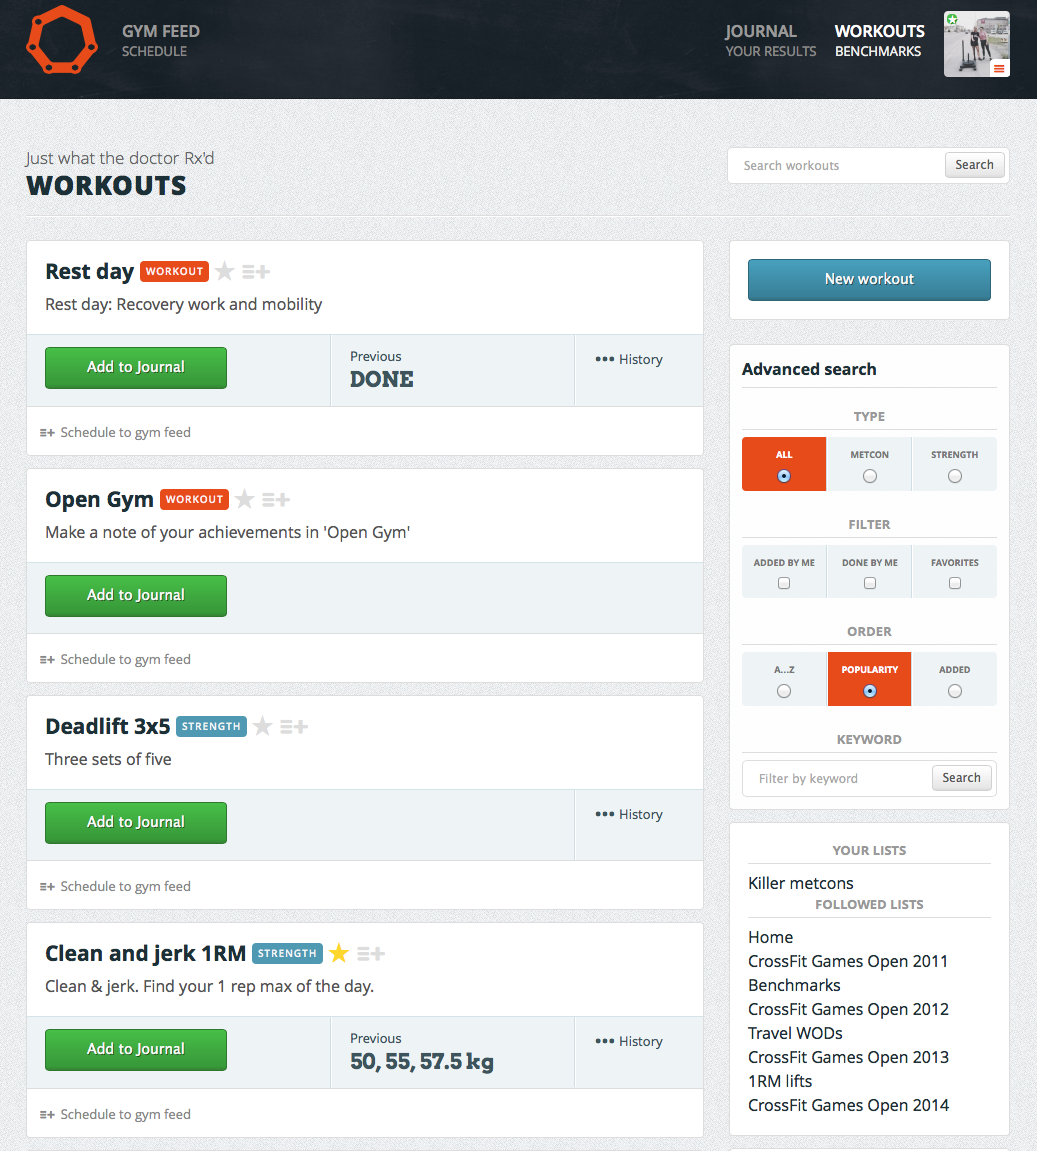
What if you want to or must do something outside the programming, but can’t come up with a good workout? The workouts page is a workout bank, where you can search for metcons and strength workouts as well as search, follow or create workout lists. At the moment there is more than 100 000 workouts in WODconnect, so before creating your own workout, make sure to check if it’s there already. For example all crossfit benchmark workouts have already been created.
1.4.1 Workout search
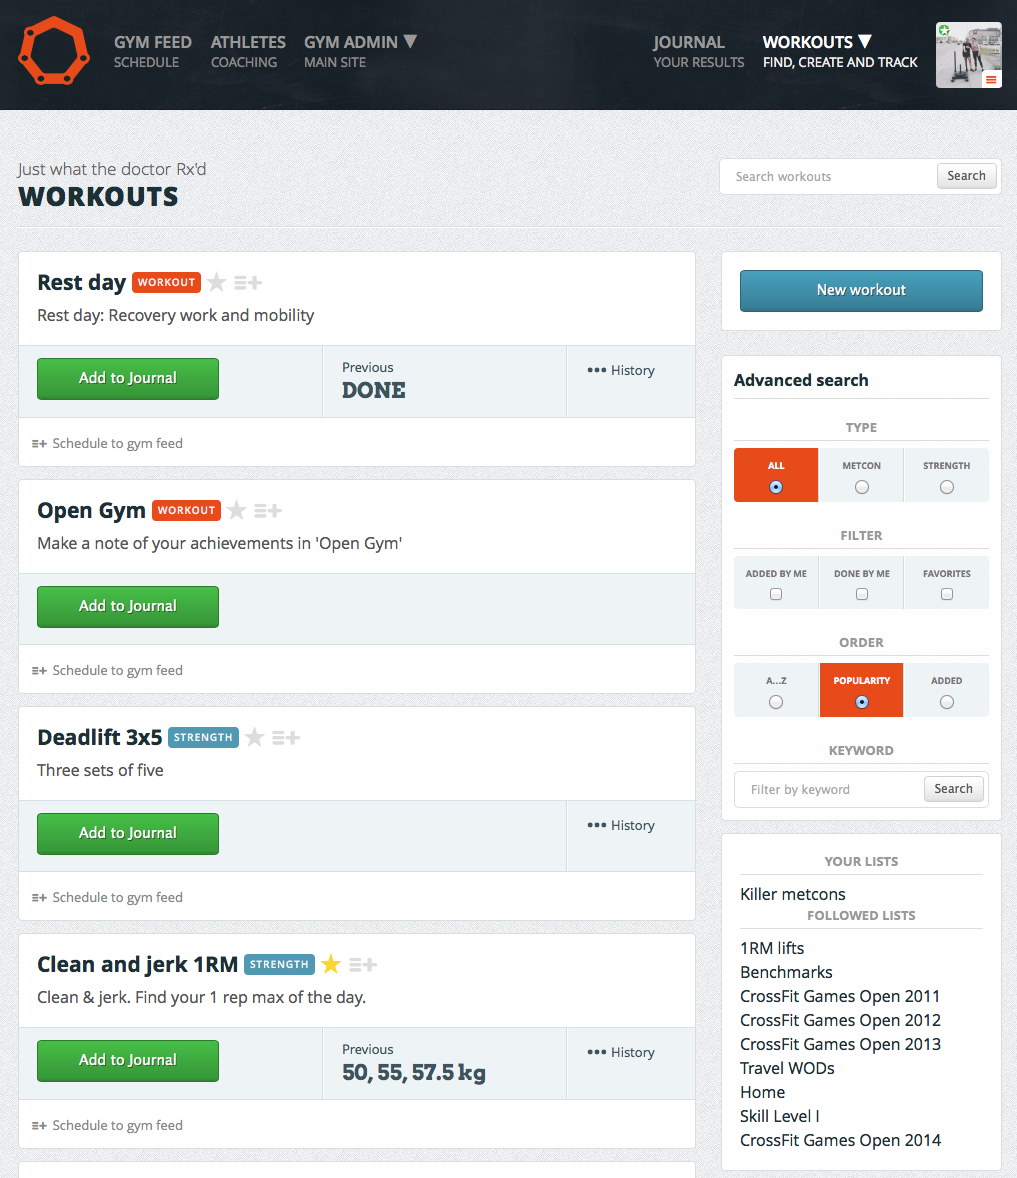
You can search for workouts by using simple search or advanced search. In advanced search, choose the workout type, filters and result order. Use a keyword to get the closest results.
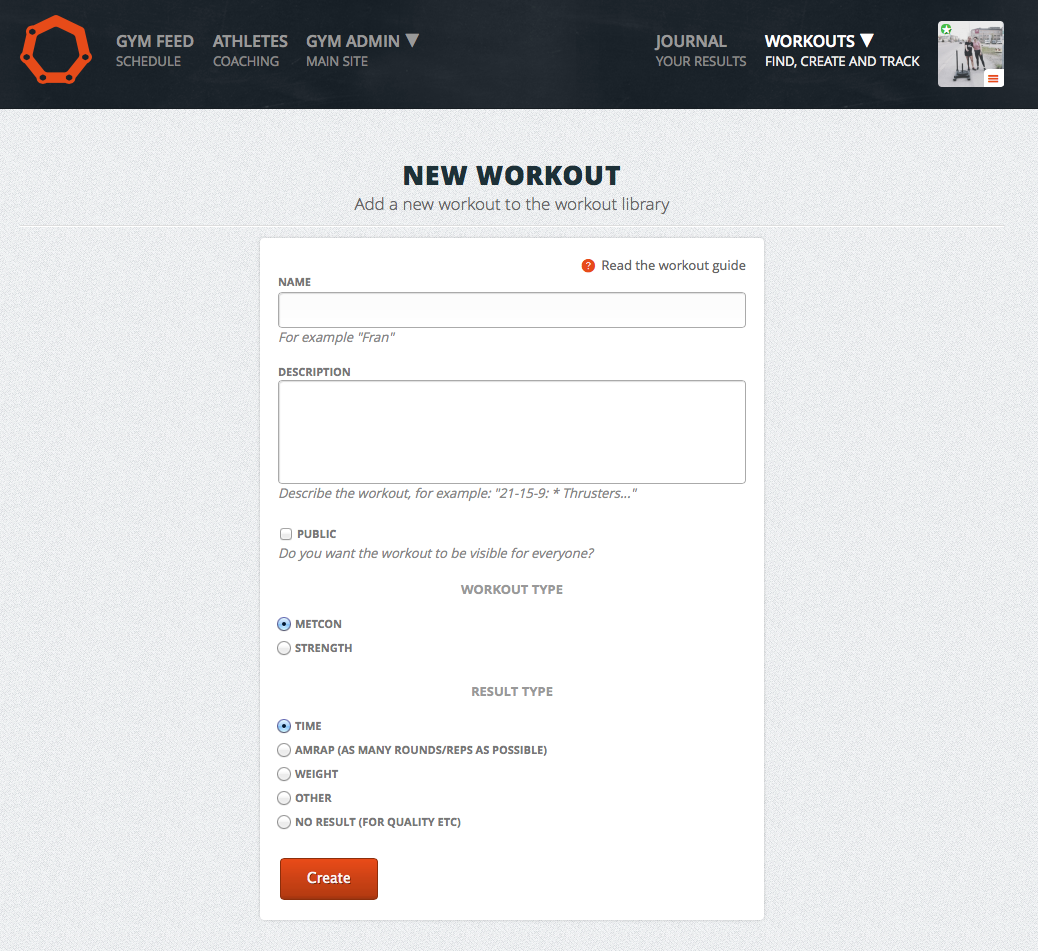
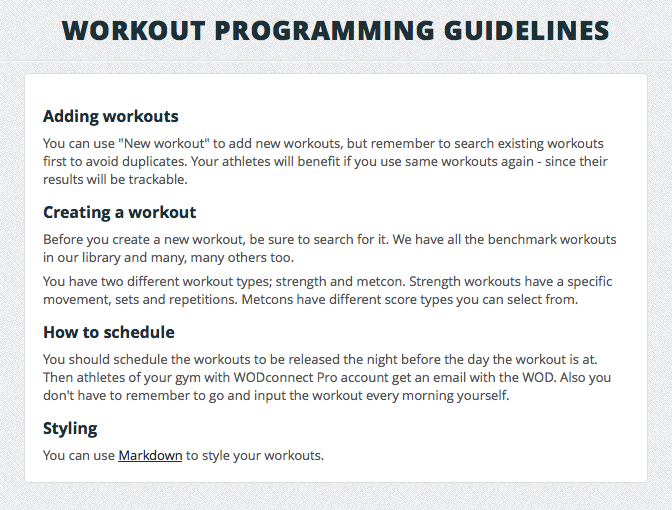
1.4.2 Creating own workouts
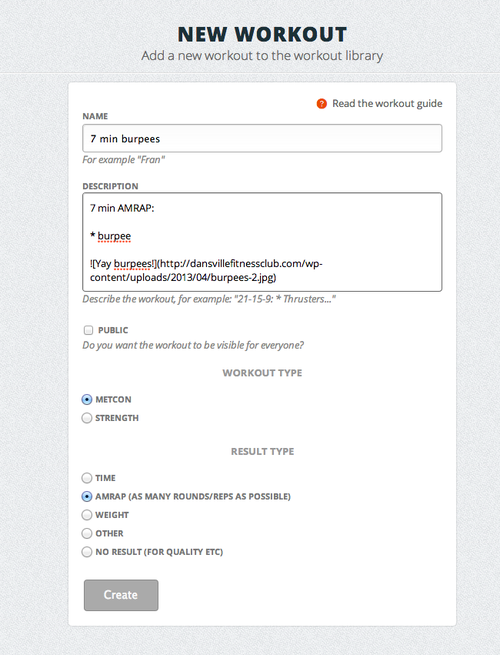
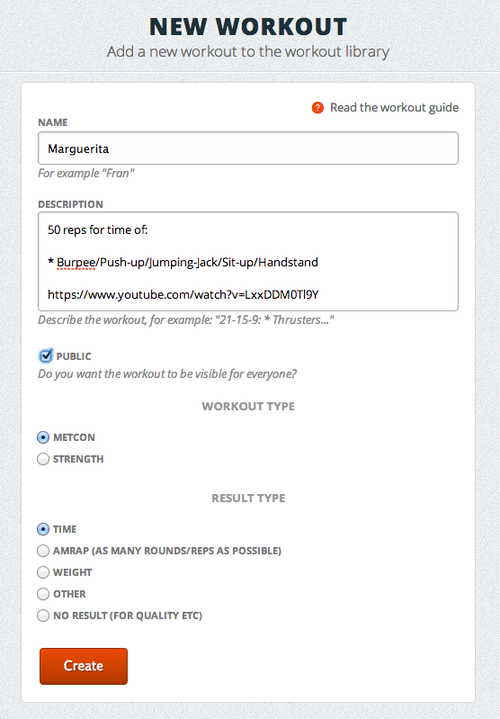
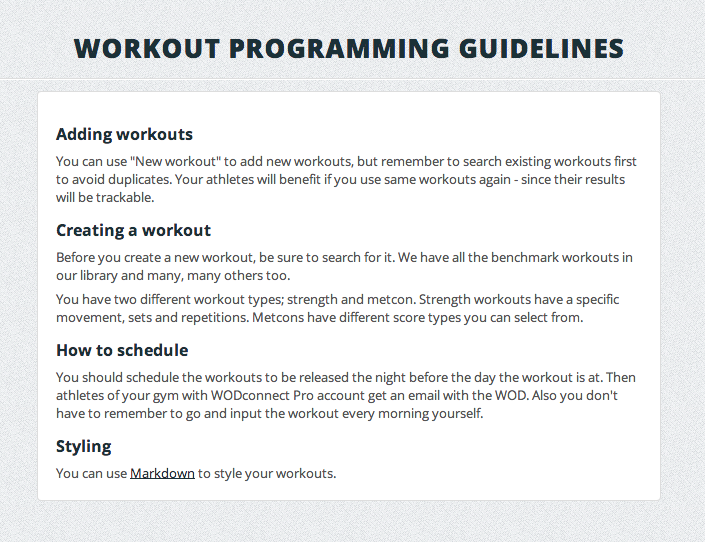
If the workout you want to add does not exist yet, go ahead and create it. Click “new workout” on the workouts page. Come up with a name for the workout, add a descpription and choose if you want to make it public.
You have two different workout types; strength and metcon. Strength workouts have a specific movement, sets and repetitions. Metcons have different score types you can select from.
You can use Markdown to style your workouts.
1.4.2.1 Workouts with photos and videos
WODconnect allows you to style your posts using Markdown syntax. This allows you to highlight, link and create lists. One thing that this also allows you to do is to create workouts with photos.
When creating a new workout, add a photo or video by either A) uploading it from your computer, or B) copying its link.
A) Quick guide for uploading a file from your computer: https://www.youtube.com/watch?v=Xvc5OOot9S4&feature=youtu.be
B) Adding a photo from internet - Write the link in this format:

Choose a text, it will show when pointing the photo with the cursor.
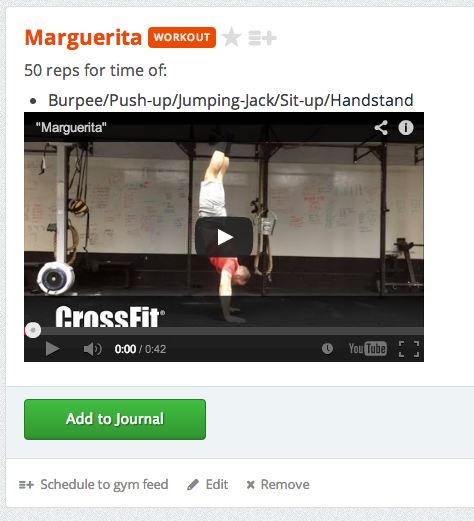
WODconnect also supports Youtube and Vimeo links in workout descriptions and comments. You just need to paste in the Youtube or Vimeo link, and that’s all.
1.4.3 Workout lists
The workout list feature allows you to keep record of your favorite and least favorite workouts. It’s a good opportunity for gyms to list their personal benchmark workouts as well.
Click “Browse public lists” on the right sidebar of the workouts page. There you can find existing lists, follow them and create new ones.
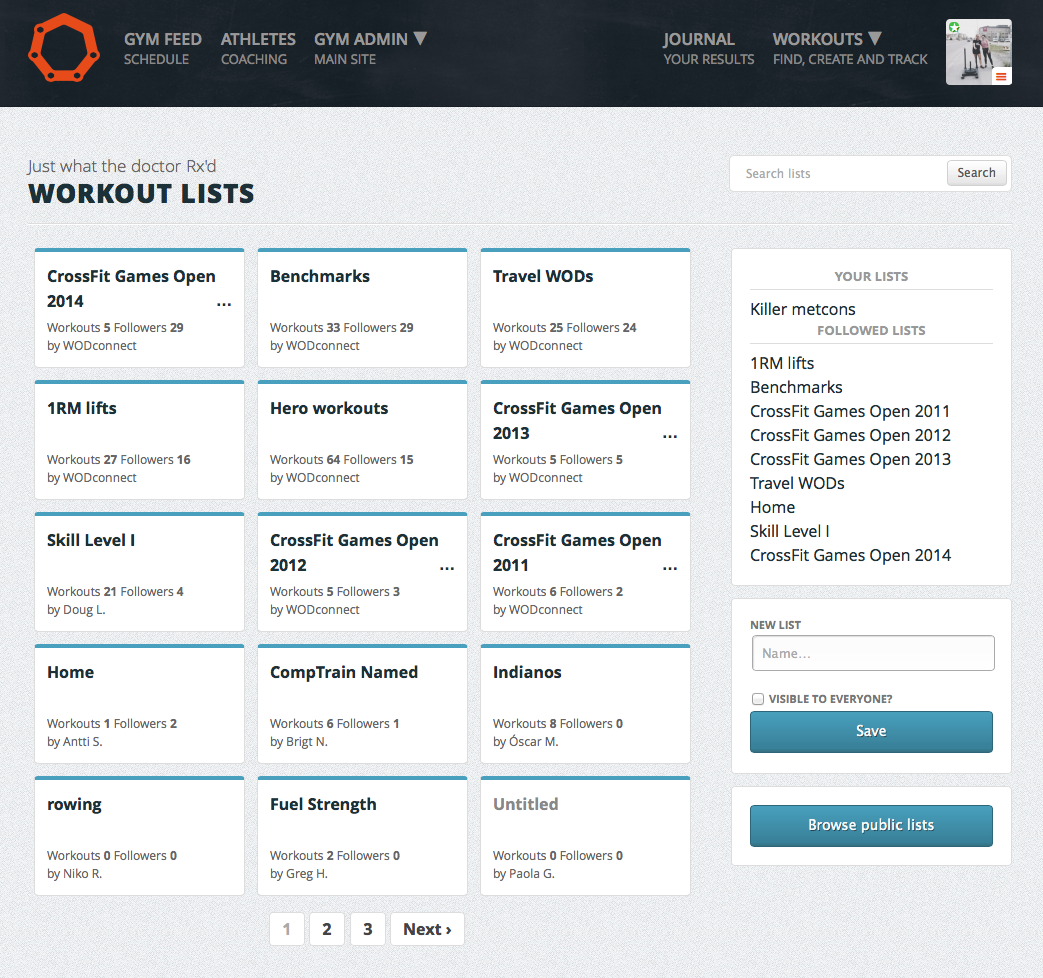 Add a workout to your workout list by clicking the list icon next to the workout header. Publish your list so that everyone can enjoy your workouts. Adding photos and videos to your workouts will make your list more interesting (check chapter 1.4.2.1).
Good lists to follow are for example Benchmarks, 1RM lifts and Travel WODs – those are published by WODconnect. We also publish CrossFit Games Open workout lists every year, make sure you follow them as well! It’s an easy way for gyms to add the Open workouts to their programming when they are released.
This is the first version of the workout list feature and we are aiming to improve it later on.
1.5 Class booking
If your gym uses WODconnect class booking system, you will see a “Book classes at your gym” button on the right sidebar of your gym feed. Clicking it will take you to the class view, where you can choose which classes you want to attend.
When you book a class, the number of participants and the class information on the left side of the page will update. You can cancel the booking by clicking the red ‘cancel’ button that appears when you have booked the class.
Classes have a queueing possibility, which can be switched on and off by the gym admin. Athletes can join a queue if all spots for the class are taken. If a participant cancels, the first athlete in the queue will automatically get his/her spot and a notification email about it.
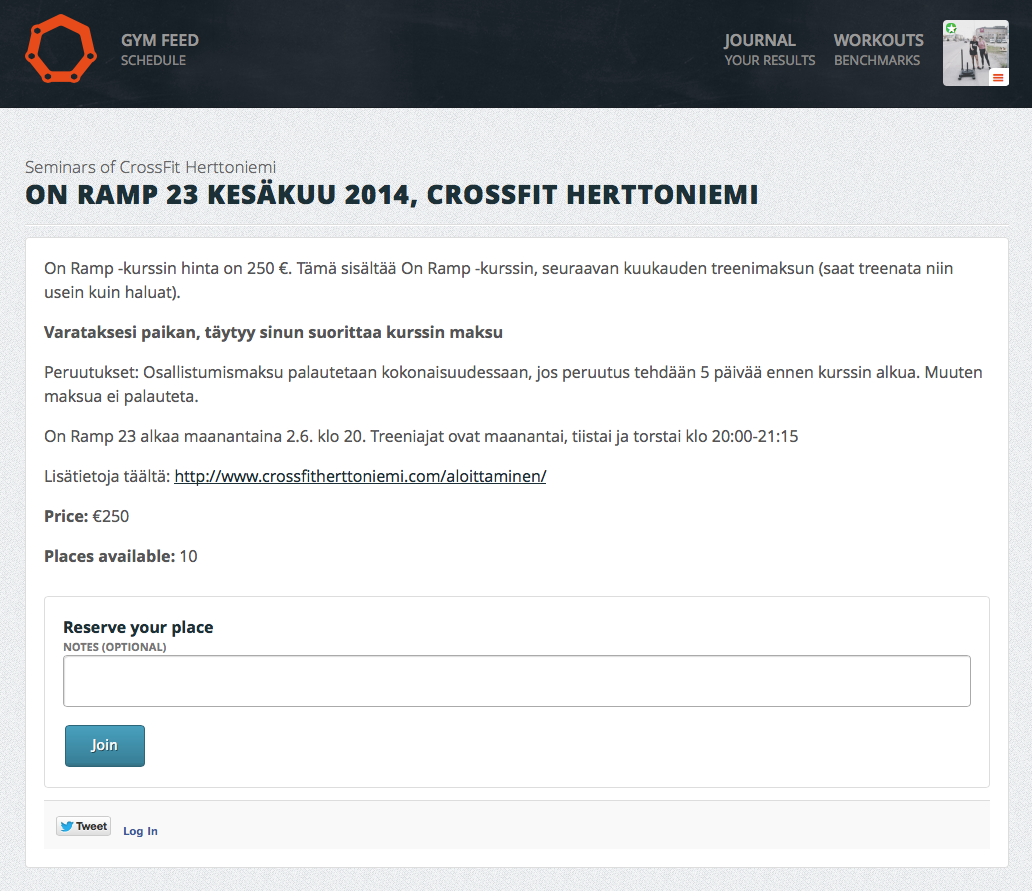
1.6 Seminars
WODconnect is also a tool for managing different kind of gym related events. We call these events seminars. Most frequently organized seminars are on ramp courses, but seminars can be anything from an olympic weightlifting course to a nutrition seminar.
Participating in a seminar is simple. When you see a seminar announced, open the link in the ad and make your reservation by clicking “join” and following the payment instructions. Payment will reserve a place to the seminar.
1.7 Notifications
Different notifications appear as orange boxes in the navigation. When someone cheers or comments your result, the notification appears on the corner of your profile picture. Unpaid bill notifications appear above the navigation.

Clicking “notifications” from the dropdown menu will take you to a list of all your notifications. You can see all your bills by clicking the link in the notification or “Your bills” from the dropdown menu.

If you choose so, you will also get a notification email when someone comments your result. In that case, go to settings and turn on the notifications .When yo receive a bill, you will always get a notification in your email.
1.8 Settings
View your personal settings by clicking “settings” from the dropdown meny. The settings consist of profile, gym, password and account settings.
In the profile settings you can set your profile picture, adjust your name, emails and profile information. You can also adjust your workout views by choosing units (kg/lbs) and the starting day of the week. In addition, you can adjust your email notifications about comments and sign up for our useful newsletter. If you are a pro user, you can choose if you want to get daily WOD notifications in your email and hide your pro status if you want to.

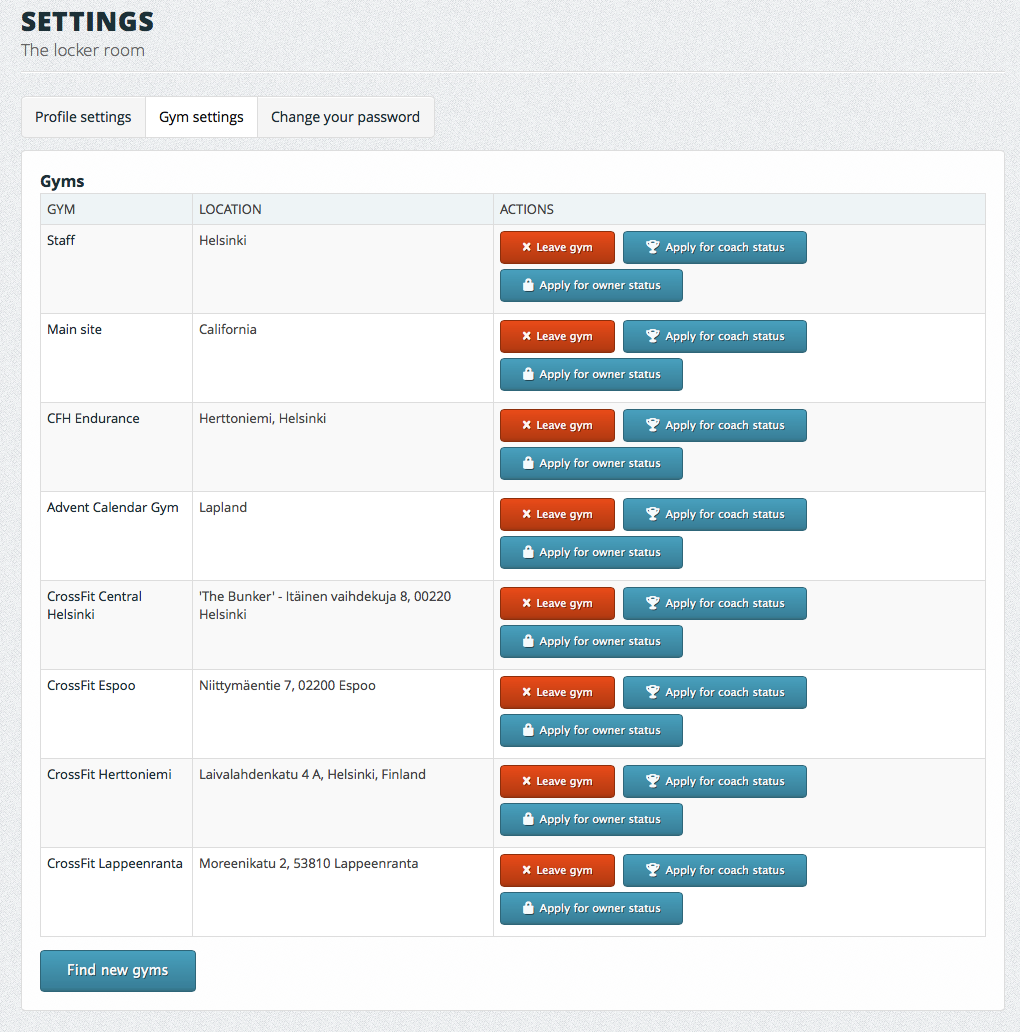
In gym settings you see all the gyms you have joined. You can easily leave gyms or apply for coach or owner status in the “actions” section. There is also a link to the gym search, if you are interested to join other gyms.
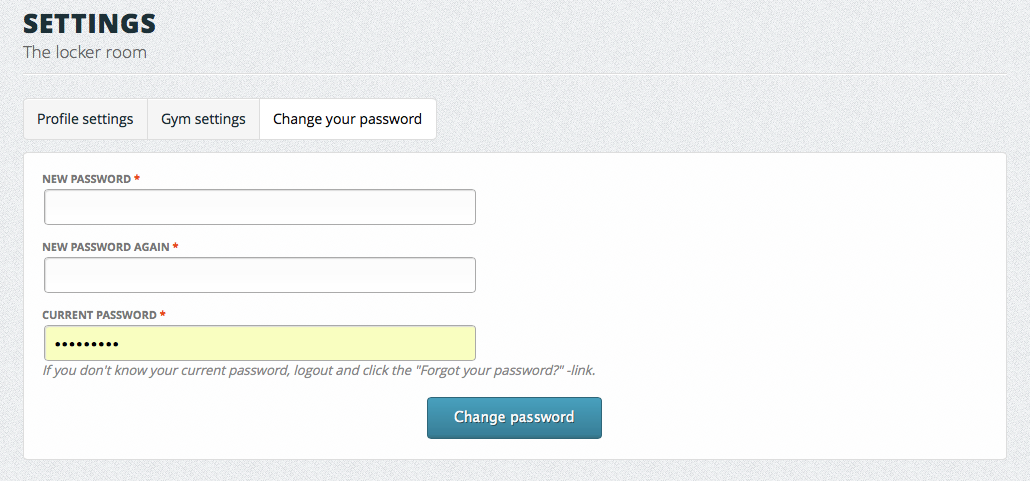
Last, there are the usual password settings.
1.8.1 Pro account
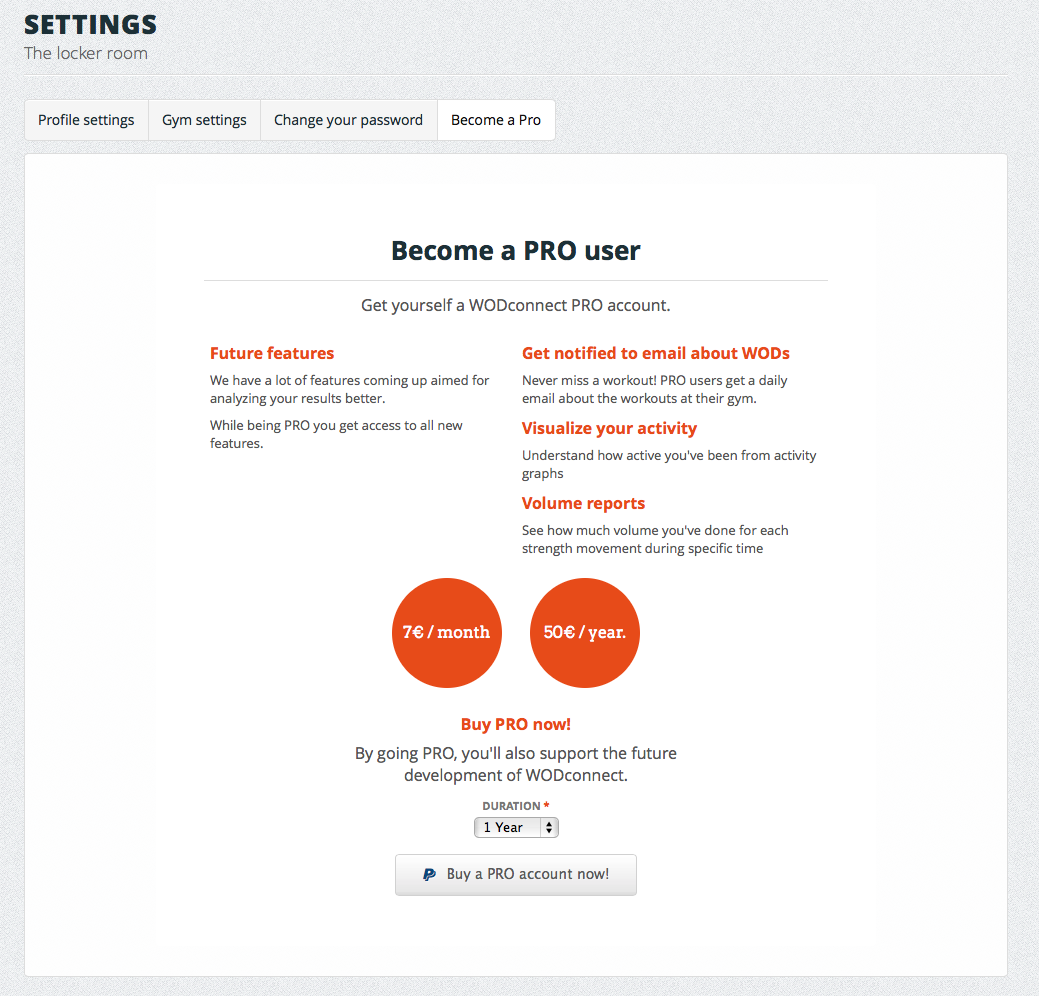
To make the most out of workout tracking, it’s recommended to become pro. A pro account provides you more useful features:
- Get notified about WODs in your email
- Visualize your activity with the Dashboard (see chapter 1.3.2)
- See your strength training volumes for any time period (see chapter 1.3.2)
- And more to come!
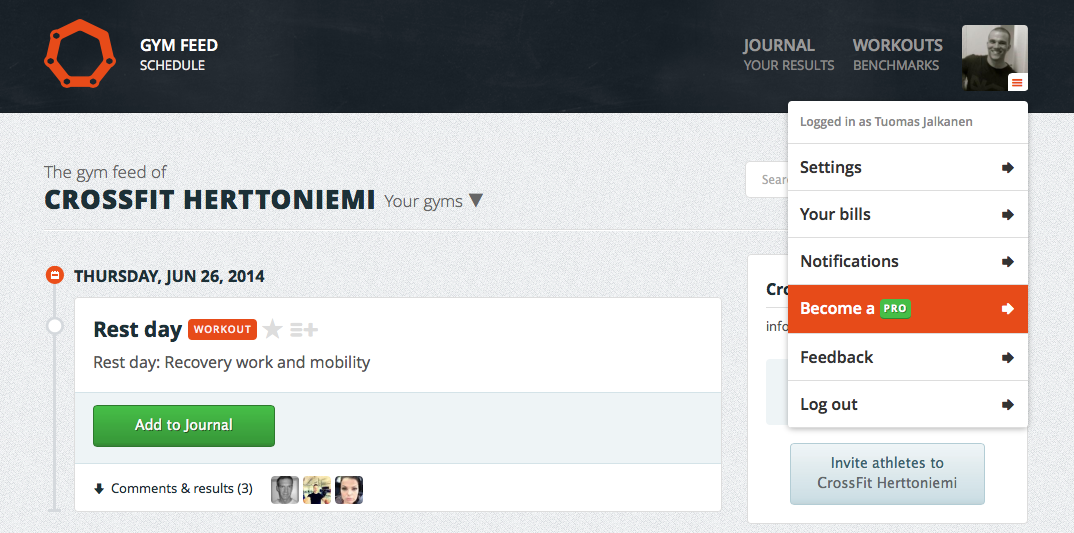
Get the pro account by clicking “become a pro” from the dropdown menu or settings. The following view will guide you forward. You can choose to buy it for a year with 50€, or just try it first for 7€ a month. By becoming pro you will also support the development of WODconnect – we will never stop making your user experience even better.
1.8.2 Confirming billing email address
Each time billing email address is changed, we ask you to confirm it. This is to avoid typos and non-working email addresses.
When you change your billing email address, you will see this notification:
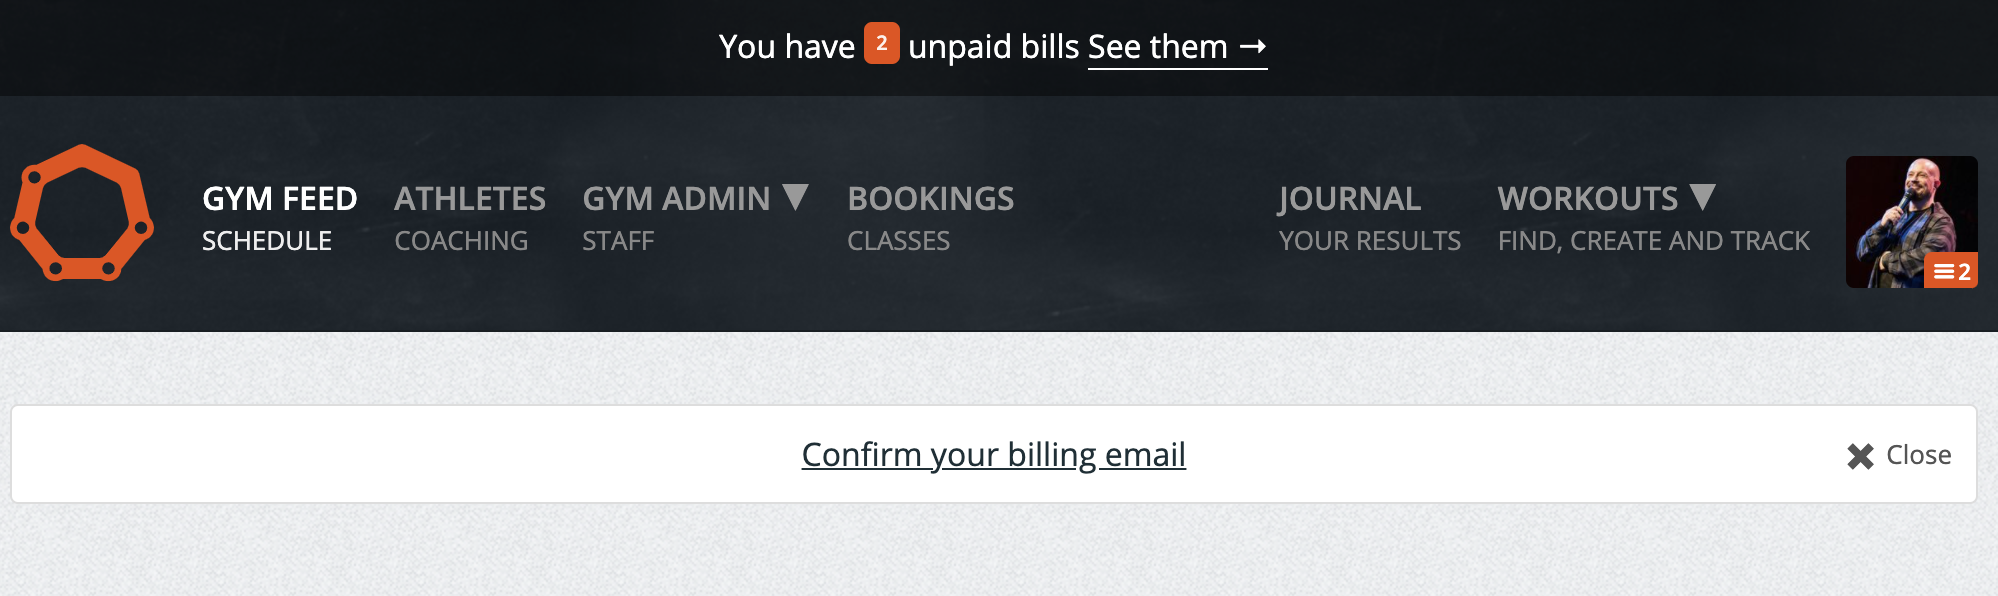
You can click “Confirm your billing email” text or go to settings.
In settings you’ll see this button:

Clicking that button will send an email with confirmation link to your new billing email. Clicking that link will confirm your email address.
2. COACH
WODconnect helps a coach to understand his/her athletes’ current and past condition, workout habits and backgrounds better. It provides information that stays unmentioned at the gym, and gives an opportunity to coach more often, privately and even remotely.
The main functions for a coach are scheduling and publishing workouts in gym feed, following athletes’ progress there and in their journals, posting comments and scheduling classes.
To get a coach status at a gym in WODconnect, join the gym and click “apply for coach status” in the right sidebar of the gym feed. You can do this also in your gym settings (see chapter 2.6).
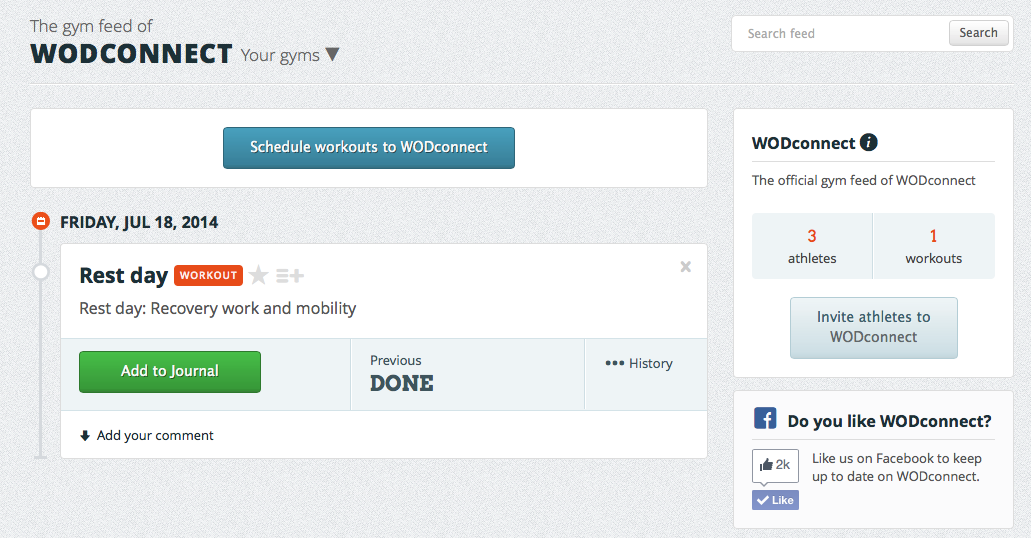
2.1 Gym feed
Gym feed is the page where a gym publishes its programming, and where its athletes mark their results and socialize around them. It’s also the landing page when logging in. You can have a coach or owner status at several gyms at the same time, but manage one at a time by choosing from the “Your gyms” dropdown menu.
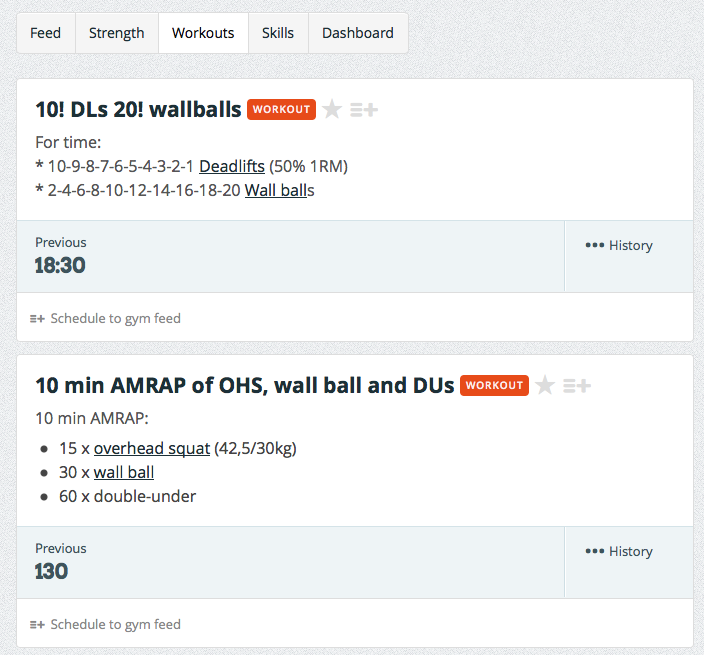
2.1.1 Scheduling workouts
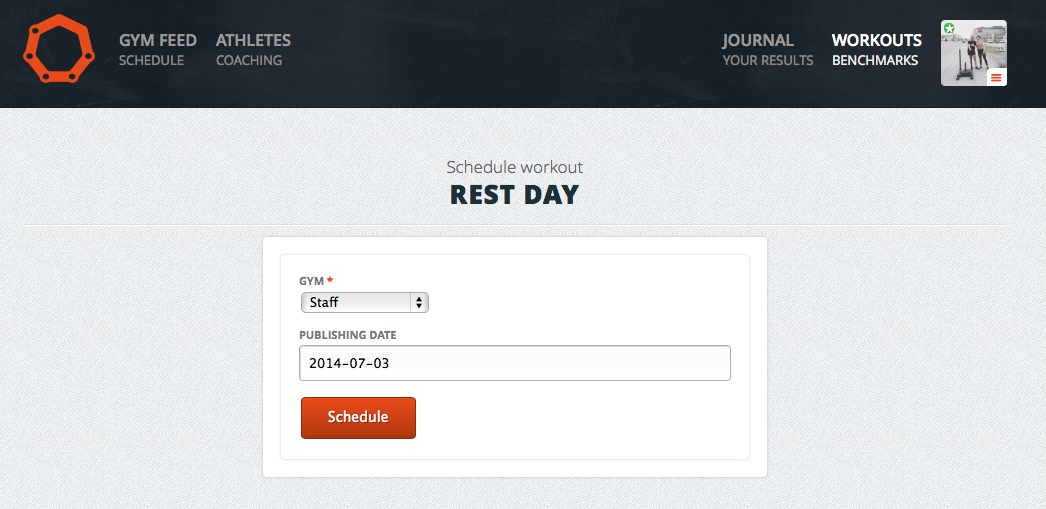
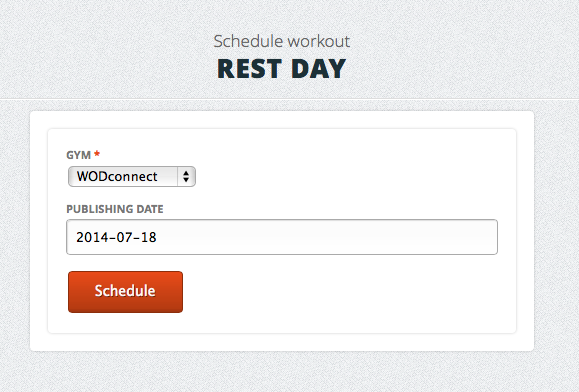
One of the main functions of WODconnect is scheduling/programming workouts. Read chapter 1.4 to find out how to search and create workouts. For coaches, the workouts page is similar as for the athletes, but all the workouts have a “schedule to gym feed” option.

Clicking that will take you to another window, where you need to put the gym and the date to which you want the workout to be scheduled.
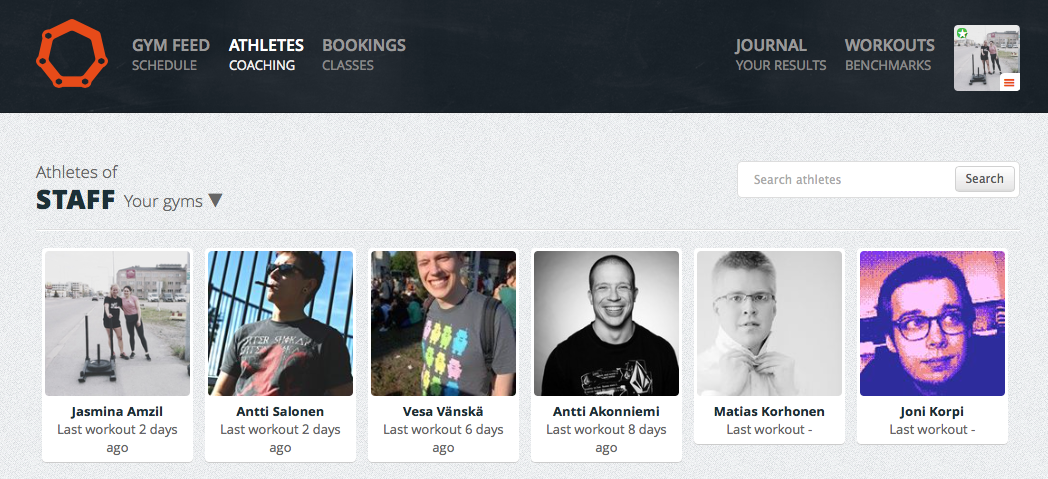
2.2 Athletes view
The ‘athletes’ page shows all your athletes. Under their profile pictures you see when their last workout was. This is a good way to notice those who haven’t been training for a while, assuming that your athletes regularly mark their results to WODconnect.
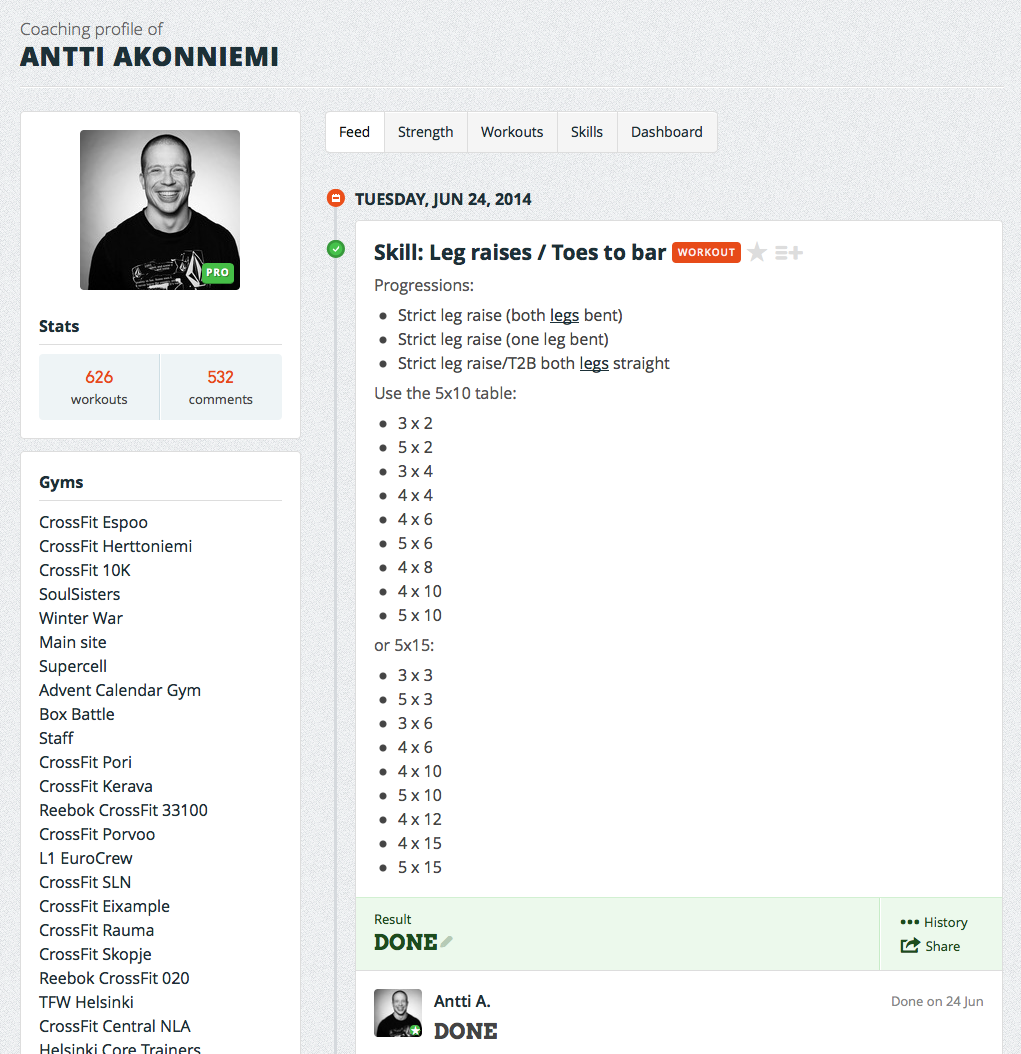
2.2.1 Coaching profiles
When you click the name of an athlete in the athletes view, you will see his/her coaching profile. It has the same contents as the athlete journal, so it covers everything you need to know about the athlete’s results, progress and activity. This is the place where you can leave comments, even include instructing videos, and cheer the athlete privately.
2.3 Commenting
You can comment athletes’ results either publicly in the gym feed, or privately in their coaching profiles. In gym feed, click ‘comments & results’ to see all the posts and comments for that specific workout. In the coaching profile you see only the athlete’s own comments.
To spice up your comments, why not add a photo or even a video? Do that by adding the photo url, Youtube or Vimeo link to your comment. This is also a great tool for coaching and giving tips after a workout. Photos and videos can be added to original workouts as well, more of that in chapter 1.4.2.1.

2.4 Classes
Some gyms don’t need booking systems as their members distribute to classes evenly throughout the day. In most cases however, at least when the gym has achieved its full member capacity, that doesn’t happen. When people choose to attend to the same classes in the evening and the gym is too crowded, a booking system is necessary.
WODconnect’s booking system is made specifically for functional training and CrossFit gyms. It’s a great tool that’s easy to use for the gym’s members, coaches and owners. For gym owners and coaches is also a great way to handle coaching shifts.
Read chapter 3.5 to learn more.
2.5 Notifications & settings
The notifications and settings for coaches are the same as the ones for athletes – read chapter 1.7 and 1.8.
3. GYMS
WODconnect is a complete tool for gym owners to make their lives easier and their businesses successful. It provides effortless payment handling, class and seminar booking, workout scheduling and customer management. WODconnect supports gym communities by providing a place to communicate and organize common events.
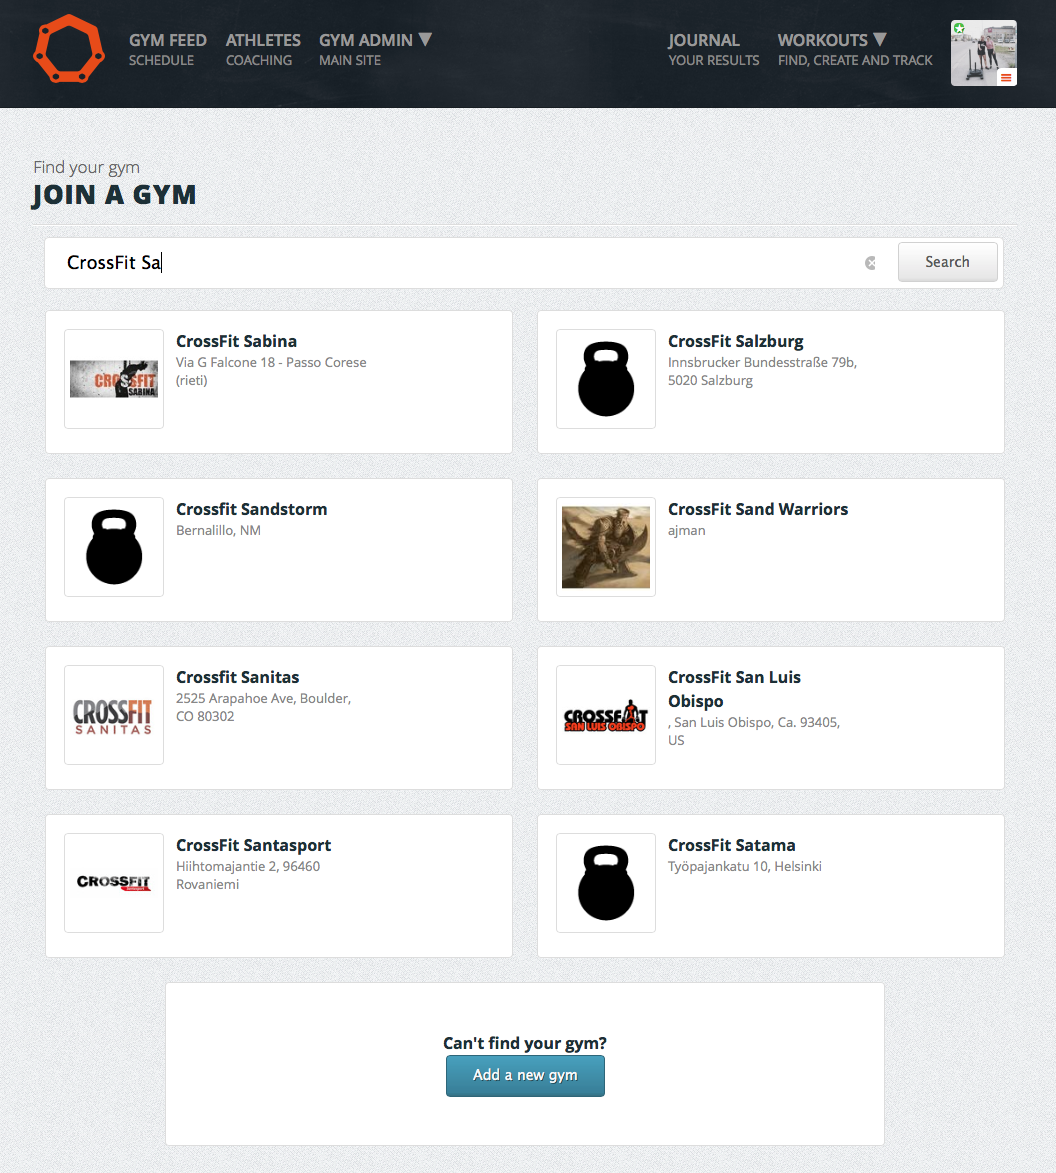
3.1 Creating a gym
Before you create your gym in WODconnect, check that someone hasn’t created it already. Start typing in the search, and see the results. Use the name or location of the gym. If it’s not there, create a new gym by choosing ‘Add a new gym’ from the bottom of the search page.
3.1.1 Gym ownership
When you create a gym, you will automatically become owner of that gym.
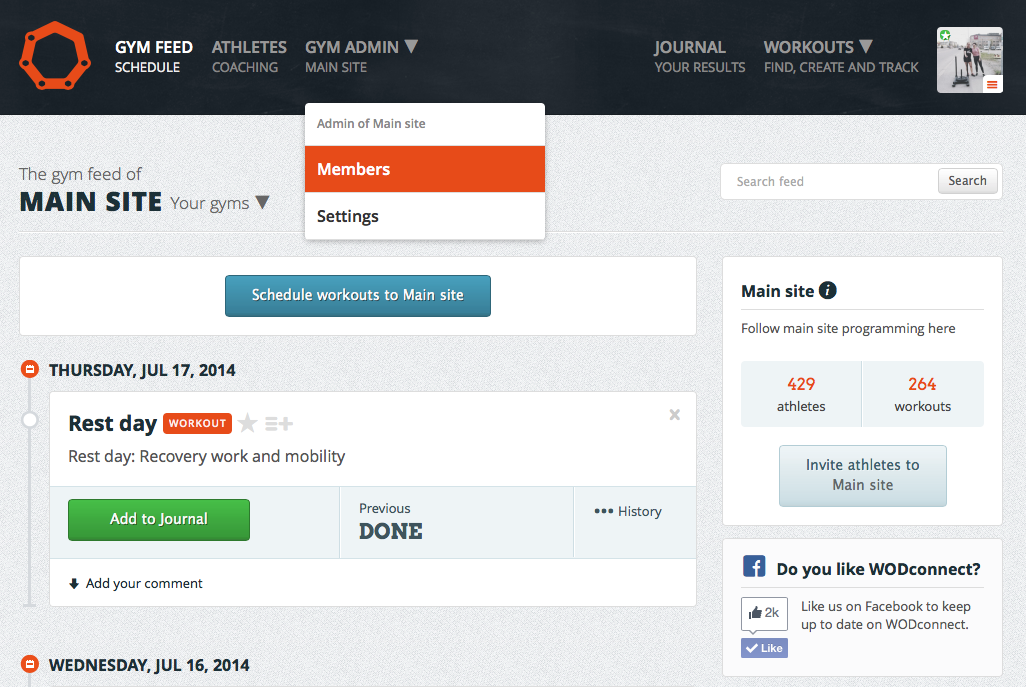
When you are a gym owner in WODconnect, you see a ‘gym admin’ dropdown menu in the navigation. There you will find all your gym related settings.
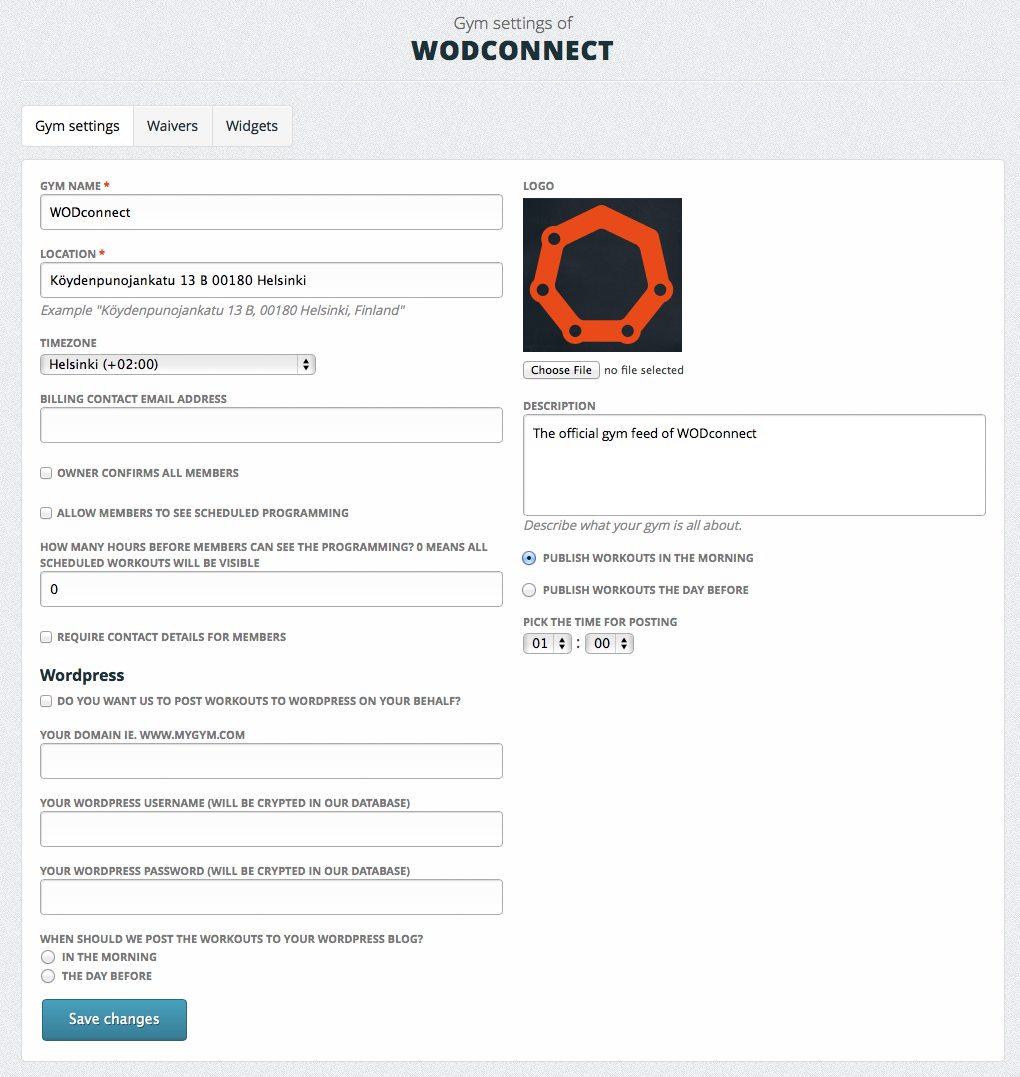
3.2 Basic settings
In the gym admin settings you can determine details regarding your workout publishing, members and your gym profile. If you use the booking or billing systems, their settings are there too.
3.2.1 Profile
Your gym profile provides the basic information about your gym, including name, location, number of athletes and workouts and the most recent workout.
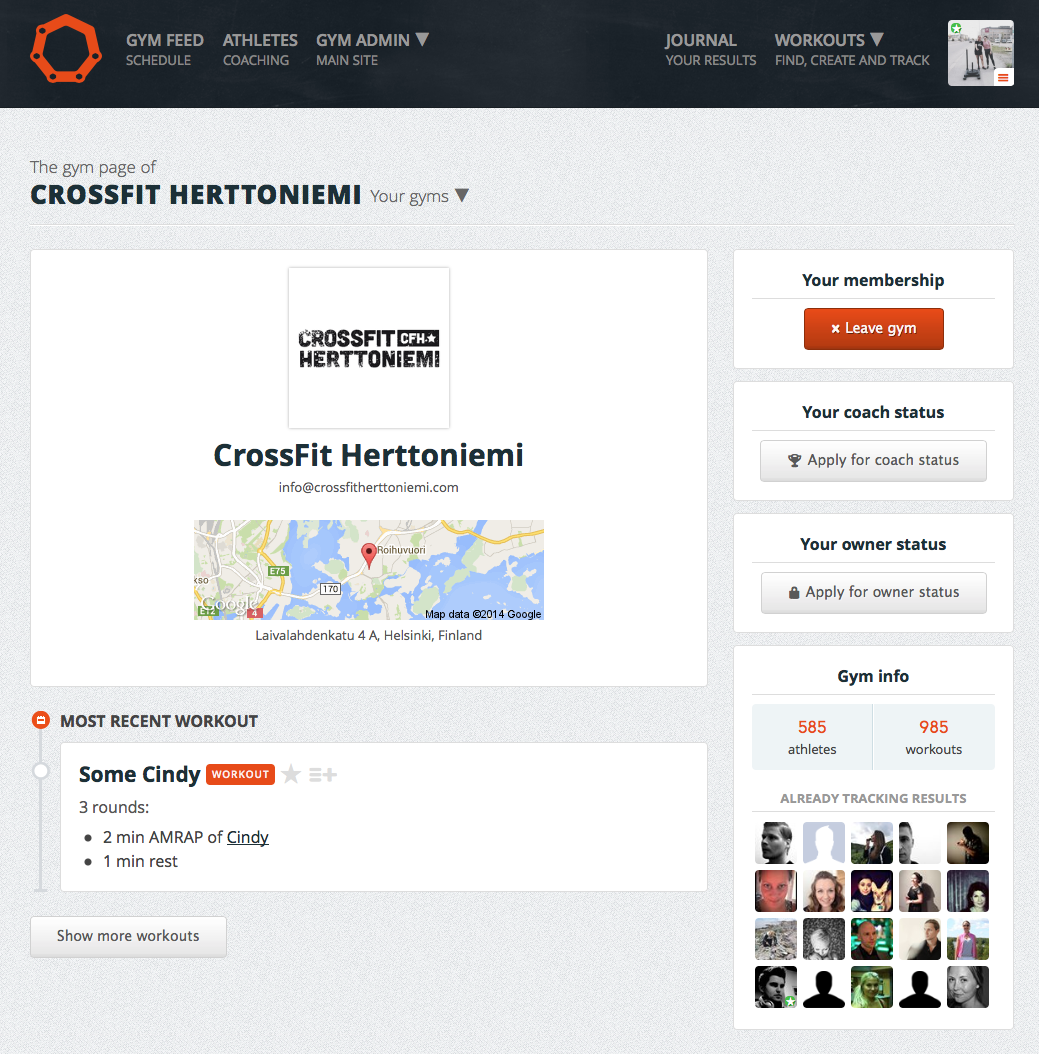
3.3 Gym feed
Gym feed is the page where you publish your programming, and where your athletes mark their results and socialize around them. It’s also the landing page when logging in. You can have a coach or owner status at several gyms at the same time, but manage one at a time by choosing from the “Your gyms” dropdown menu.
3.3.1 Scheduling workouts
One of the main functions of WODconnect is scheduling your programming. Read chapter 1.4 to find out how to search and create workouts. For coaches and gym owners all the workouts have a “schedule to gym feed” option, which is the way to add them to your published programming.

Clicking that will take you to another window, where you need to put the gym and the date to which you want the workout to be scheduled. The workout will then be saved in your gym feed.
3.3.2 Publishing workouts
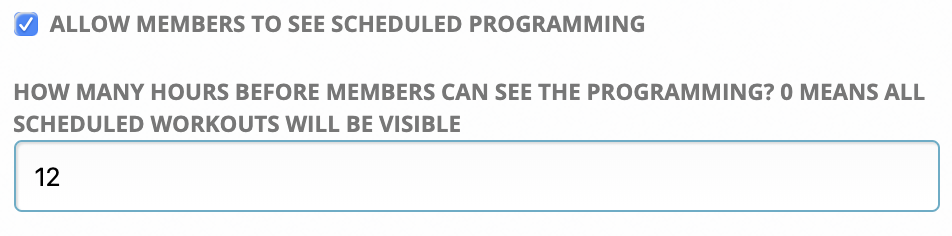
There are different ways to publish workouts. You most likely don’t want to publish your entire programming to your athletes, but one day’s workouts at a time. Most of the gyms choose to publish their WODs in the morning of the corresponding day. If that’s what you want to do, just leave ‘Allow members to see scheduled programming’ unchecked in your gym settings.
The other option is to choose ‘Allow members to see scheduled programming’, where you have to determine how many hours before they can see it. For example, if you want to show them all the scheduled workouts, put 0h. If you want them to see the workouts 2 days before, put 48h.
If you like to publish your workouts on your site, wordpress blog or Facebook, it can be automatically done by WODconnect.
Read our blog post for instructions about scheduled Wordpress posts: http://blog.wodconnect.com/post/88256233327/feature-update-scheduled-wordpress-posts
Read chapter 3.7 to get instructions for sharing your workouts on your Facebook page. We’ve also written a short blog post about it: http://blog.wodconnect.com/post/69496961285/share-your-gyms-workouts-to-facebook-page
3.4 Members
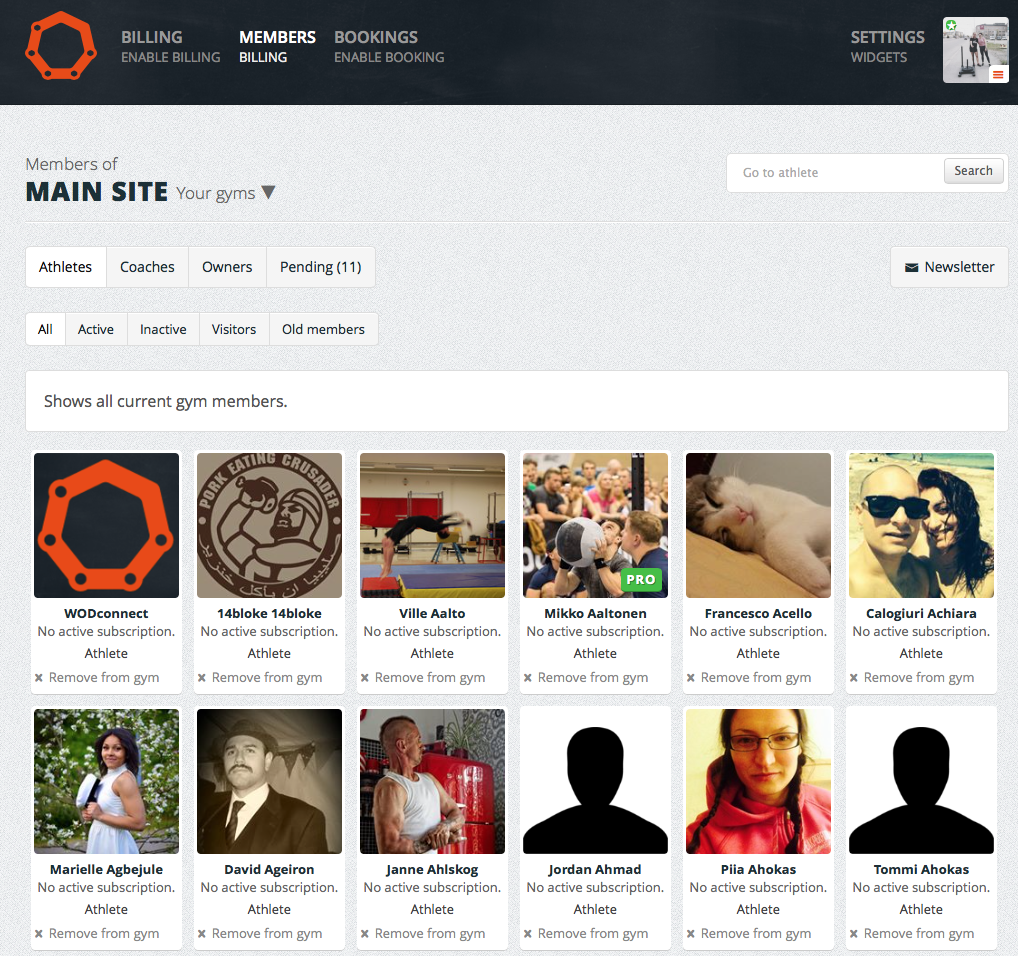
Member related settings are found in the ‘Gym Admin’ drop-down menu of the navigation.

The members -page shows all your athletes, coaches and owners and provides important information from a gym owner point of view. Keep track of who are your active, inactive or old members and accept new ones. Send newsletters to selected athletes.
3.4.1 Waivers & contact information
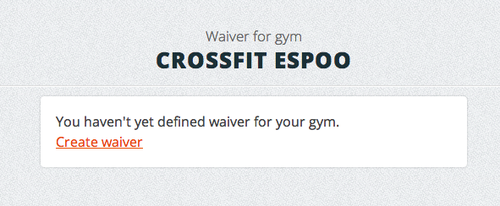
WODconnect provides a simple way to create online waivers, get them signed by your members and gather contact informations. This happens in the ‘waivers’ section of your gym settings.
Every gym owner is strongly recommended to create a waiver for her gym members. A waiver is traditionally a paper signed by a new member when she starts training at a gym, to protect the gym owner in case of injuries, for example.
Now, gyms have the possibility to create their own waiver and require all members to accept it, online. Our newest feature requires athletes to sign the gym specific waiver before they can follow the gym feed in WODconnect.
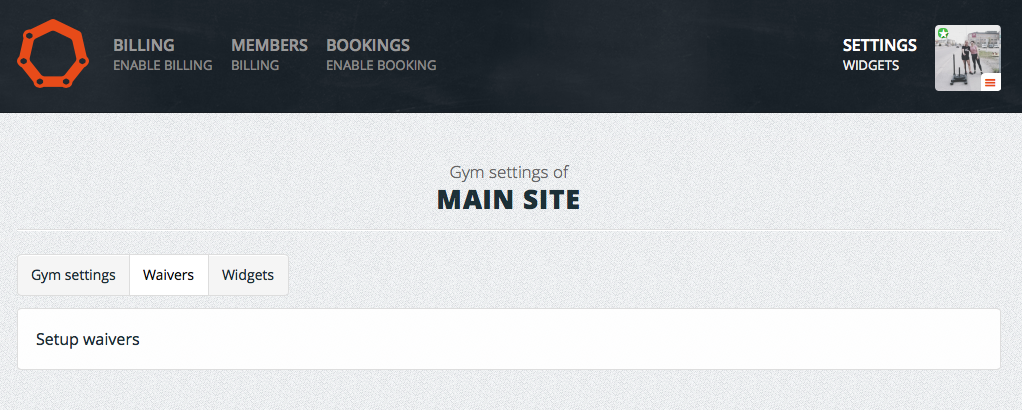
When you want to activate this feature, the process is easy. First go to the settings and select the “Waivers” tab. Then click “Setup waivers”. After that, click “Create waiver”.
Then it’s time to write your waiver. You can use Markdown syntax http://daringfireball.net/projects/markdown/syntax to format the waiver. To finish, click the submit button.
The contents of the waiver should be discussed with a lawyer, but to get an idea of a good waiver we recommend you to read the article of Monique Ames in CrossFit Journal: http://library.crossfit.com/free/pdf/CFJ_ames_waiver.pdf. She also presents many good reasons to have a waiver for your gym members.
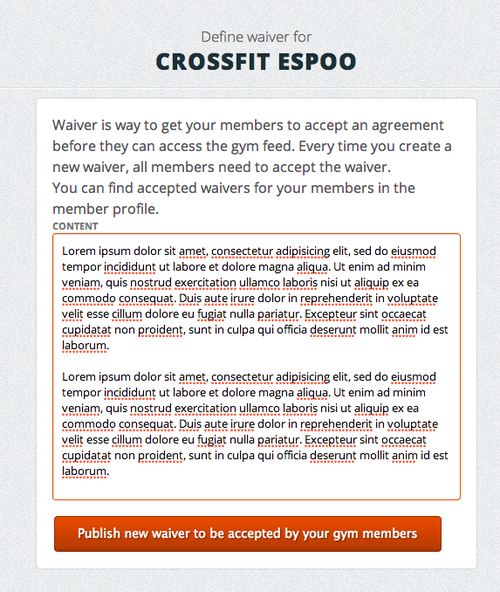
When you have submitted your waiver, you are shown the currently active waiver:
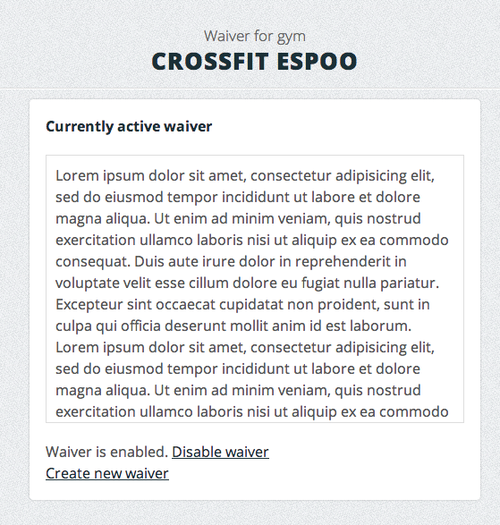
If you want, you can disable the waiver or create a new version of it, which will replace the active one and require all members to accept it again.
The gym members see the waiver when next time visiting the feed:
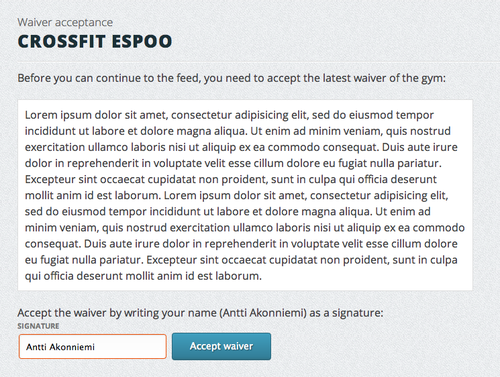
A waiver is signed only once by the gym member. Gym owners can see signed waivers for all members under their profiles.
3.4.2 Adding a membership subscription for a member
First create a membership product:
- Choose “Products” from the navigation
- Then “Membership products”
- Then “New membership product”
- Fill in name, price, billing interval, vat level and if you want to restrict booking, check that and choose how many times per week OR month members can book a class (you can override this for certain classes if needed)
- Click “Save”
Then you go to a member profile. Click “Edit” next to “Active subscription”, choose the correct product and define when the billing starts.
WODconnect sends a new bill for the member when the billing interval for this member ends unless the membership is disabled before that date. In WODconnect all memberships starts on the first and end on the last day of the month (we might change this at some point).
If a member joins during the month, we suggest the following practice:
- Member joins on 15th
- Create a single purchase product under “Products” (not a membership) for rest of the month training, for example “Two weeks training, special price”
- From “Checkout” member is sent a bill for that
- From member profile we choose a membership product for that member to start from next month
OR
- Member joins on 15th
- From member profile we choose a membership product for that member to start from this month, but we count in a discount for the missed 15 days
Benefit of having the automatic billing always from 1st to last day of the month is that everyone is following the principle. We know that when a client joins it’s a bit more work, BUT in the end it helps.
3.4.3 Disabling a membership subscription
- Go to member profile
- Choose “Edit” (next to “Active subscription”)
- Select “No membership”
- Optional: If you want to clear the “Membership billed until the end of..”, click “Edit” next to it and then “Remove”
Or you can set a date after which membership is disabled automatically, explained in this blog post: http://blog.wodconnect.com/post/131272016907/new-feature-automatic-disabling-of-membership
3.4.4 Adding/removing coach rights
Adding coach rights can be done from customer profile by clicking “Add coach rights” (under Actions). If the customer has coach rights, they can be removed from the same place by clicking “Remove coach rights”. You can also see pending coach rights and current coaches under Members -> Coaches.
3.5 Booking system
Some gyms don’t need booking systems as their members distribute to classes evenly throughout the day. In most cases however, at least when the gym has achieved its full member capacity, that doesn’t happen. When people choose to attend to the same classes in the evening and the gym is too crowded, a booking system is necessary.
WODconnect’s booking system is made specifically for functional training and CrossFit gyms. It’s a great tool that’s easy to use for your members, coaches and yourself as a gym owner. For gym owners and coaches is also a great way to handle shifts.
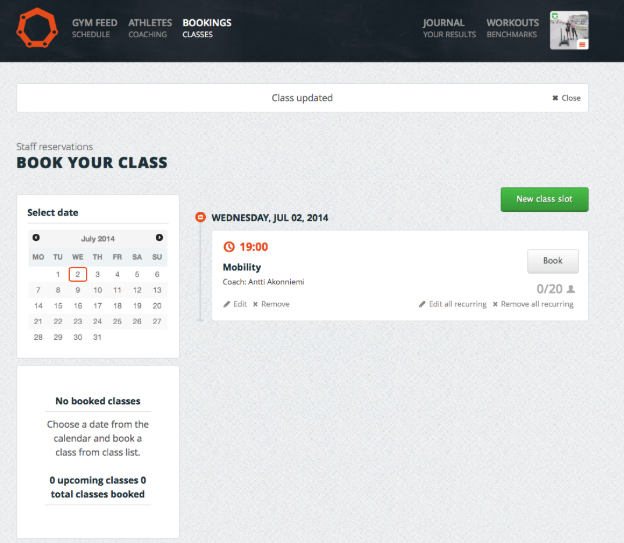
3.5.1 Booking classes
To book classes, click ‘Bookings’ from the navigation or ‘Book classes at your gym’ from the sidebar of your gym feed.

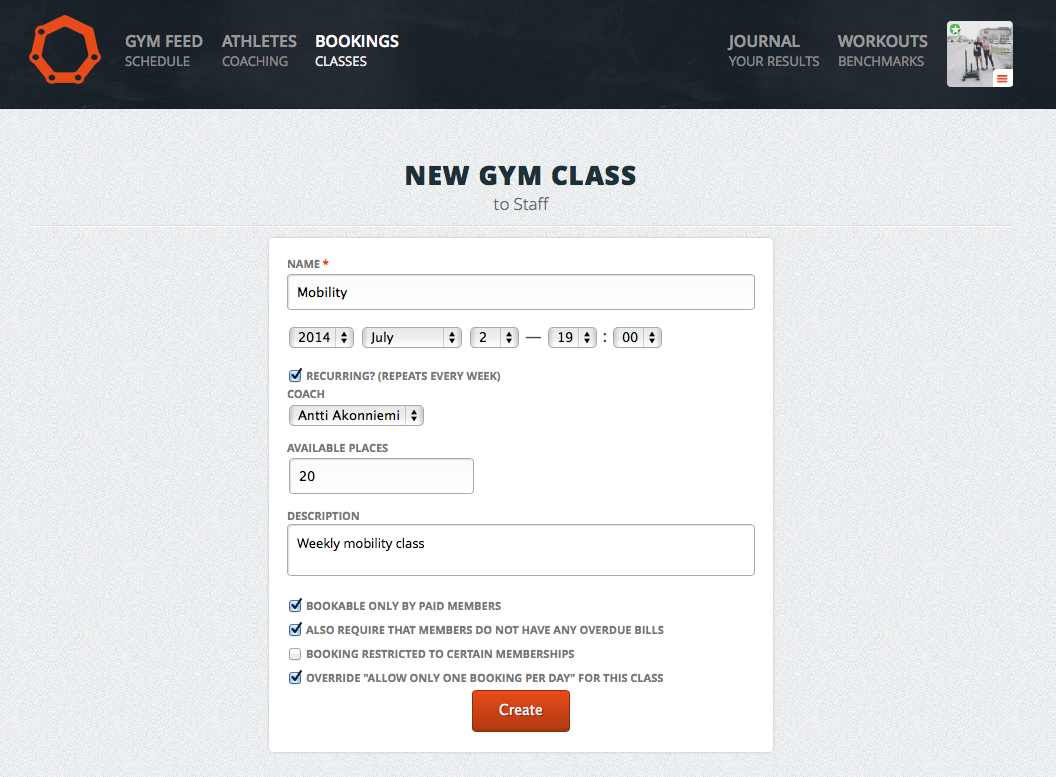
To schedule a new class, click ‘New class slot’. Name the class, pick a date, time and recurrence. Assign a coach and determine the size of the class. Add a description and choose what kind of settings you want for the class.
Your class will appear on the ‘Bookings’ page, where you can choose the view from the calendar on the left. The page tells you if you have booked classes or have classes to coach.
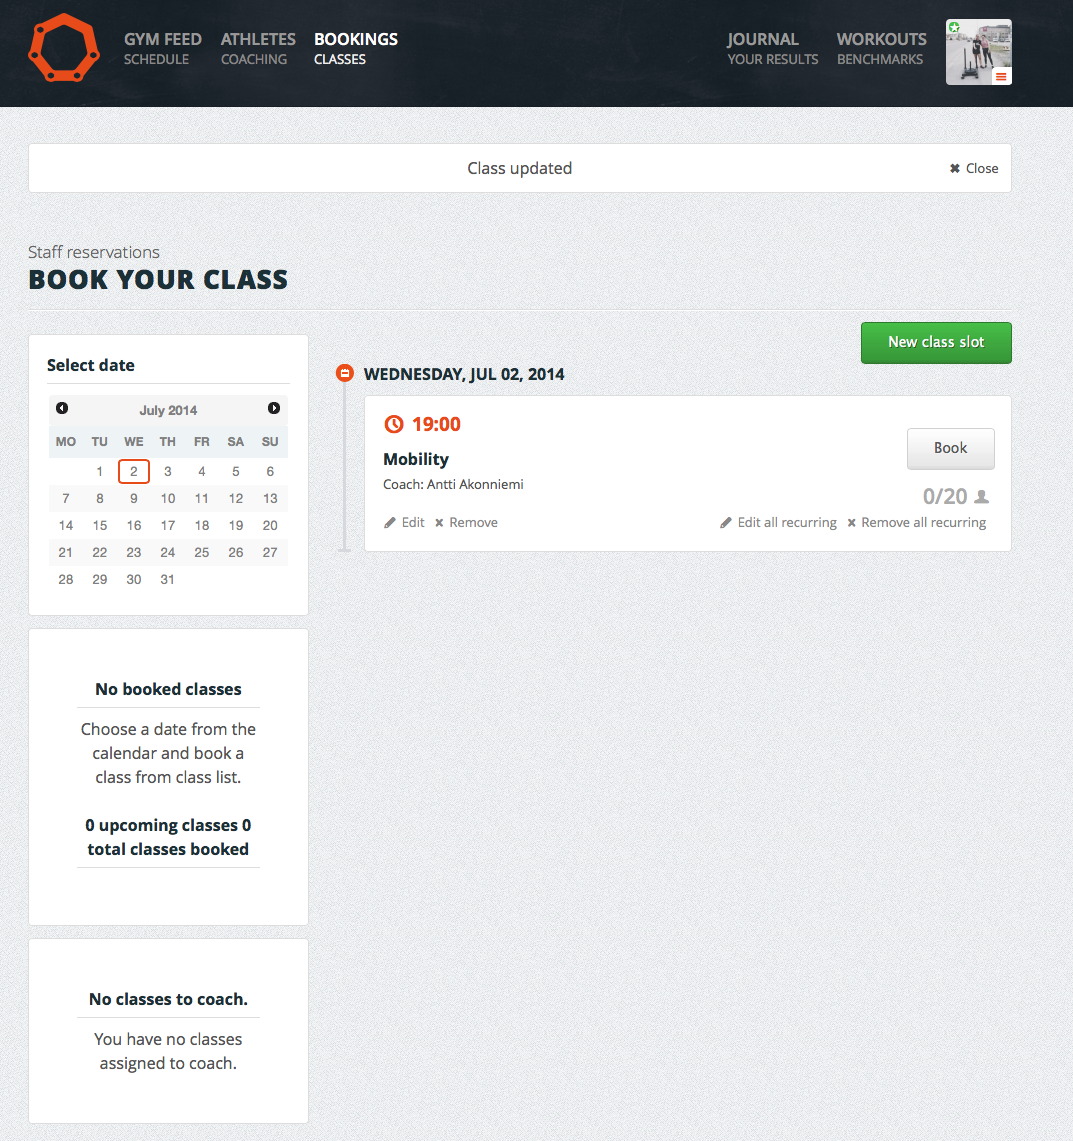
When you book a class as a participant, the number of participants and the class information on the left side of the page will update. The booking can be canceled by clicking the red button. Coaches and gym owners have the right to book, edit and remove classes.

3.5.2 Booking restrictions
The general rule is that athletes can participate to one class per day. When scheduling a new class, gym owners can override that rule to that class type. This is useful for example when you have a mobility class and you want to give the possibility to attend to that in addition to a normal class per day.
Another restriction that gyms can set is related to billing. When your gym uses both the billing and booking systems, gym admins can decide to allow only paid members to book classes. This rule can be set to one specific class or for a whole class type.
3.5.3 Queueing & cancellation policy
Classes have a queueing option, which can be switched on in the gym admin settings. Athletes can join a queue, if all spots for the class are taken. If a participant cancels, the first athlete in the queue will automatically get his/her spot and a notification email about it.
Gym admins have the possibility to set a cancellation policy for their classes. They can determine for example that a cancellation can be done only two hours before the class. For this, go to your gym admin settings.
3.5.4 Tracking bookings
WODconnect tracks class attendance, so gym owners can see how many classes an athlete has participated. This information shows in the athlete profile and when booking.
3.5.5 Attendance cards
Attendance cards are membership products that your gym can sell, and which allow the customer to book a gym class without having to pay for an active subscription. The attendance card products are only available for gyms that have the booking feature enabled, and can only be used for gym classes that require the customer to have a paid membership in order to book their place to a gym class.
It is also possible to set expiration time for attendance card products. Expiration time is set in months. When attendance card is sold, the expiration time starts counting down. After expiration, the remaining attendances are removed.
Customers can see the remaining attendances from Settings -> Gyms.
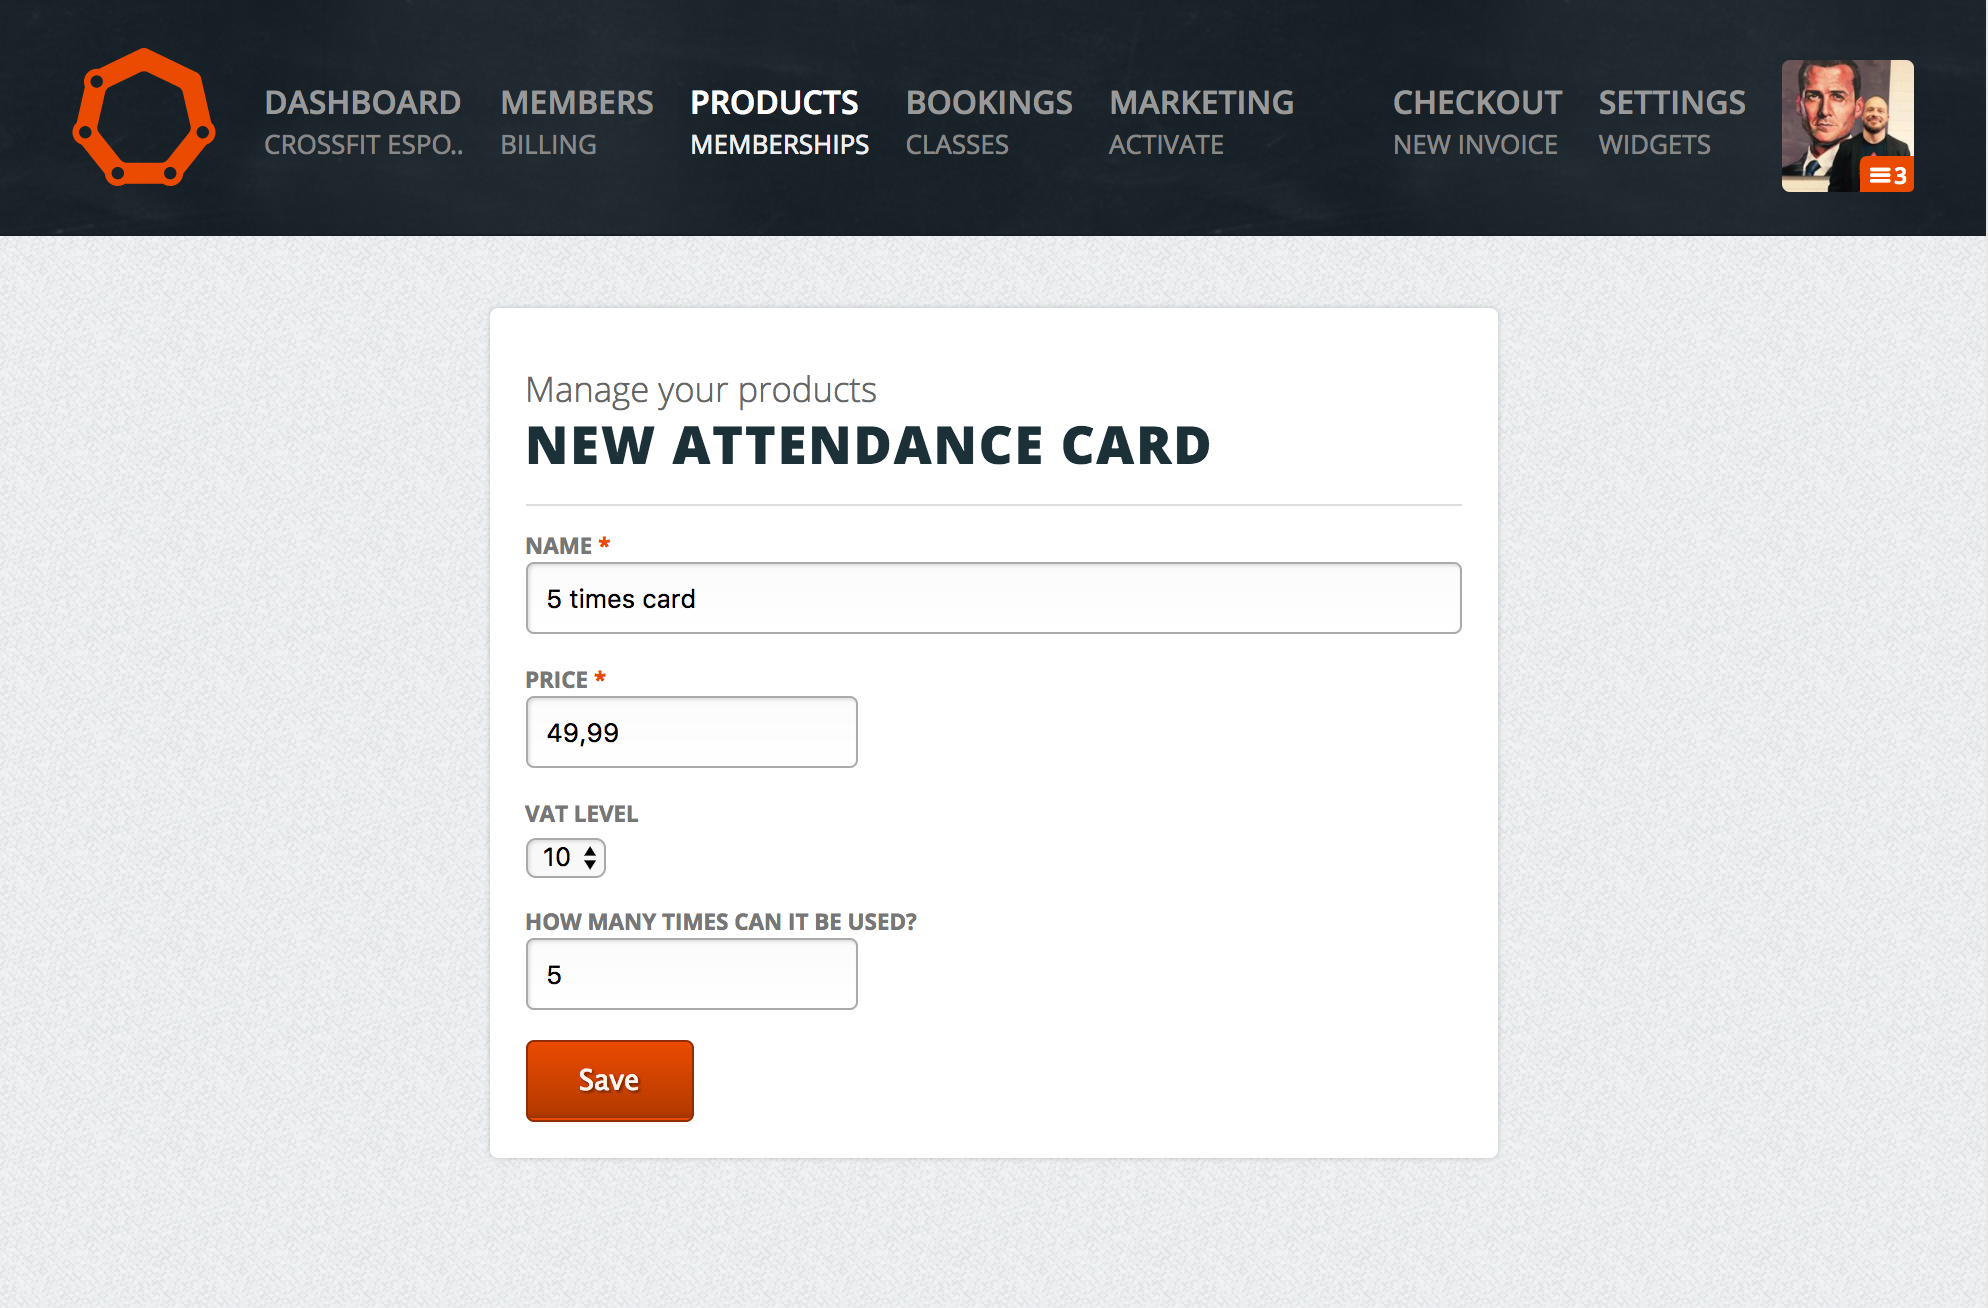
Creating attendance cards.
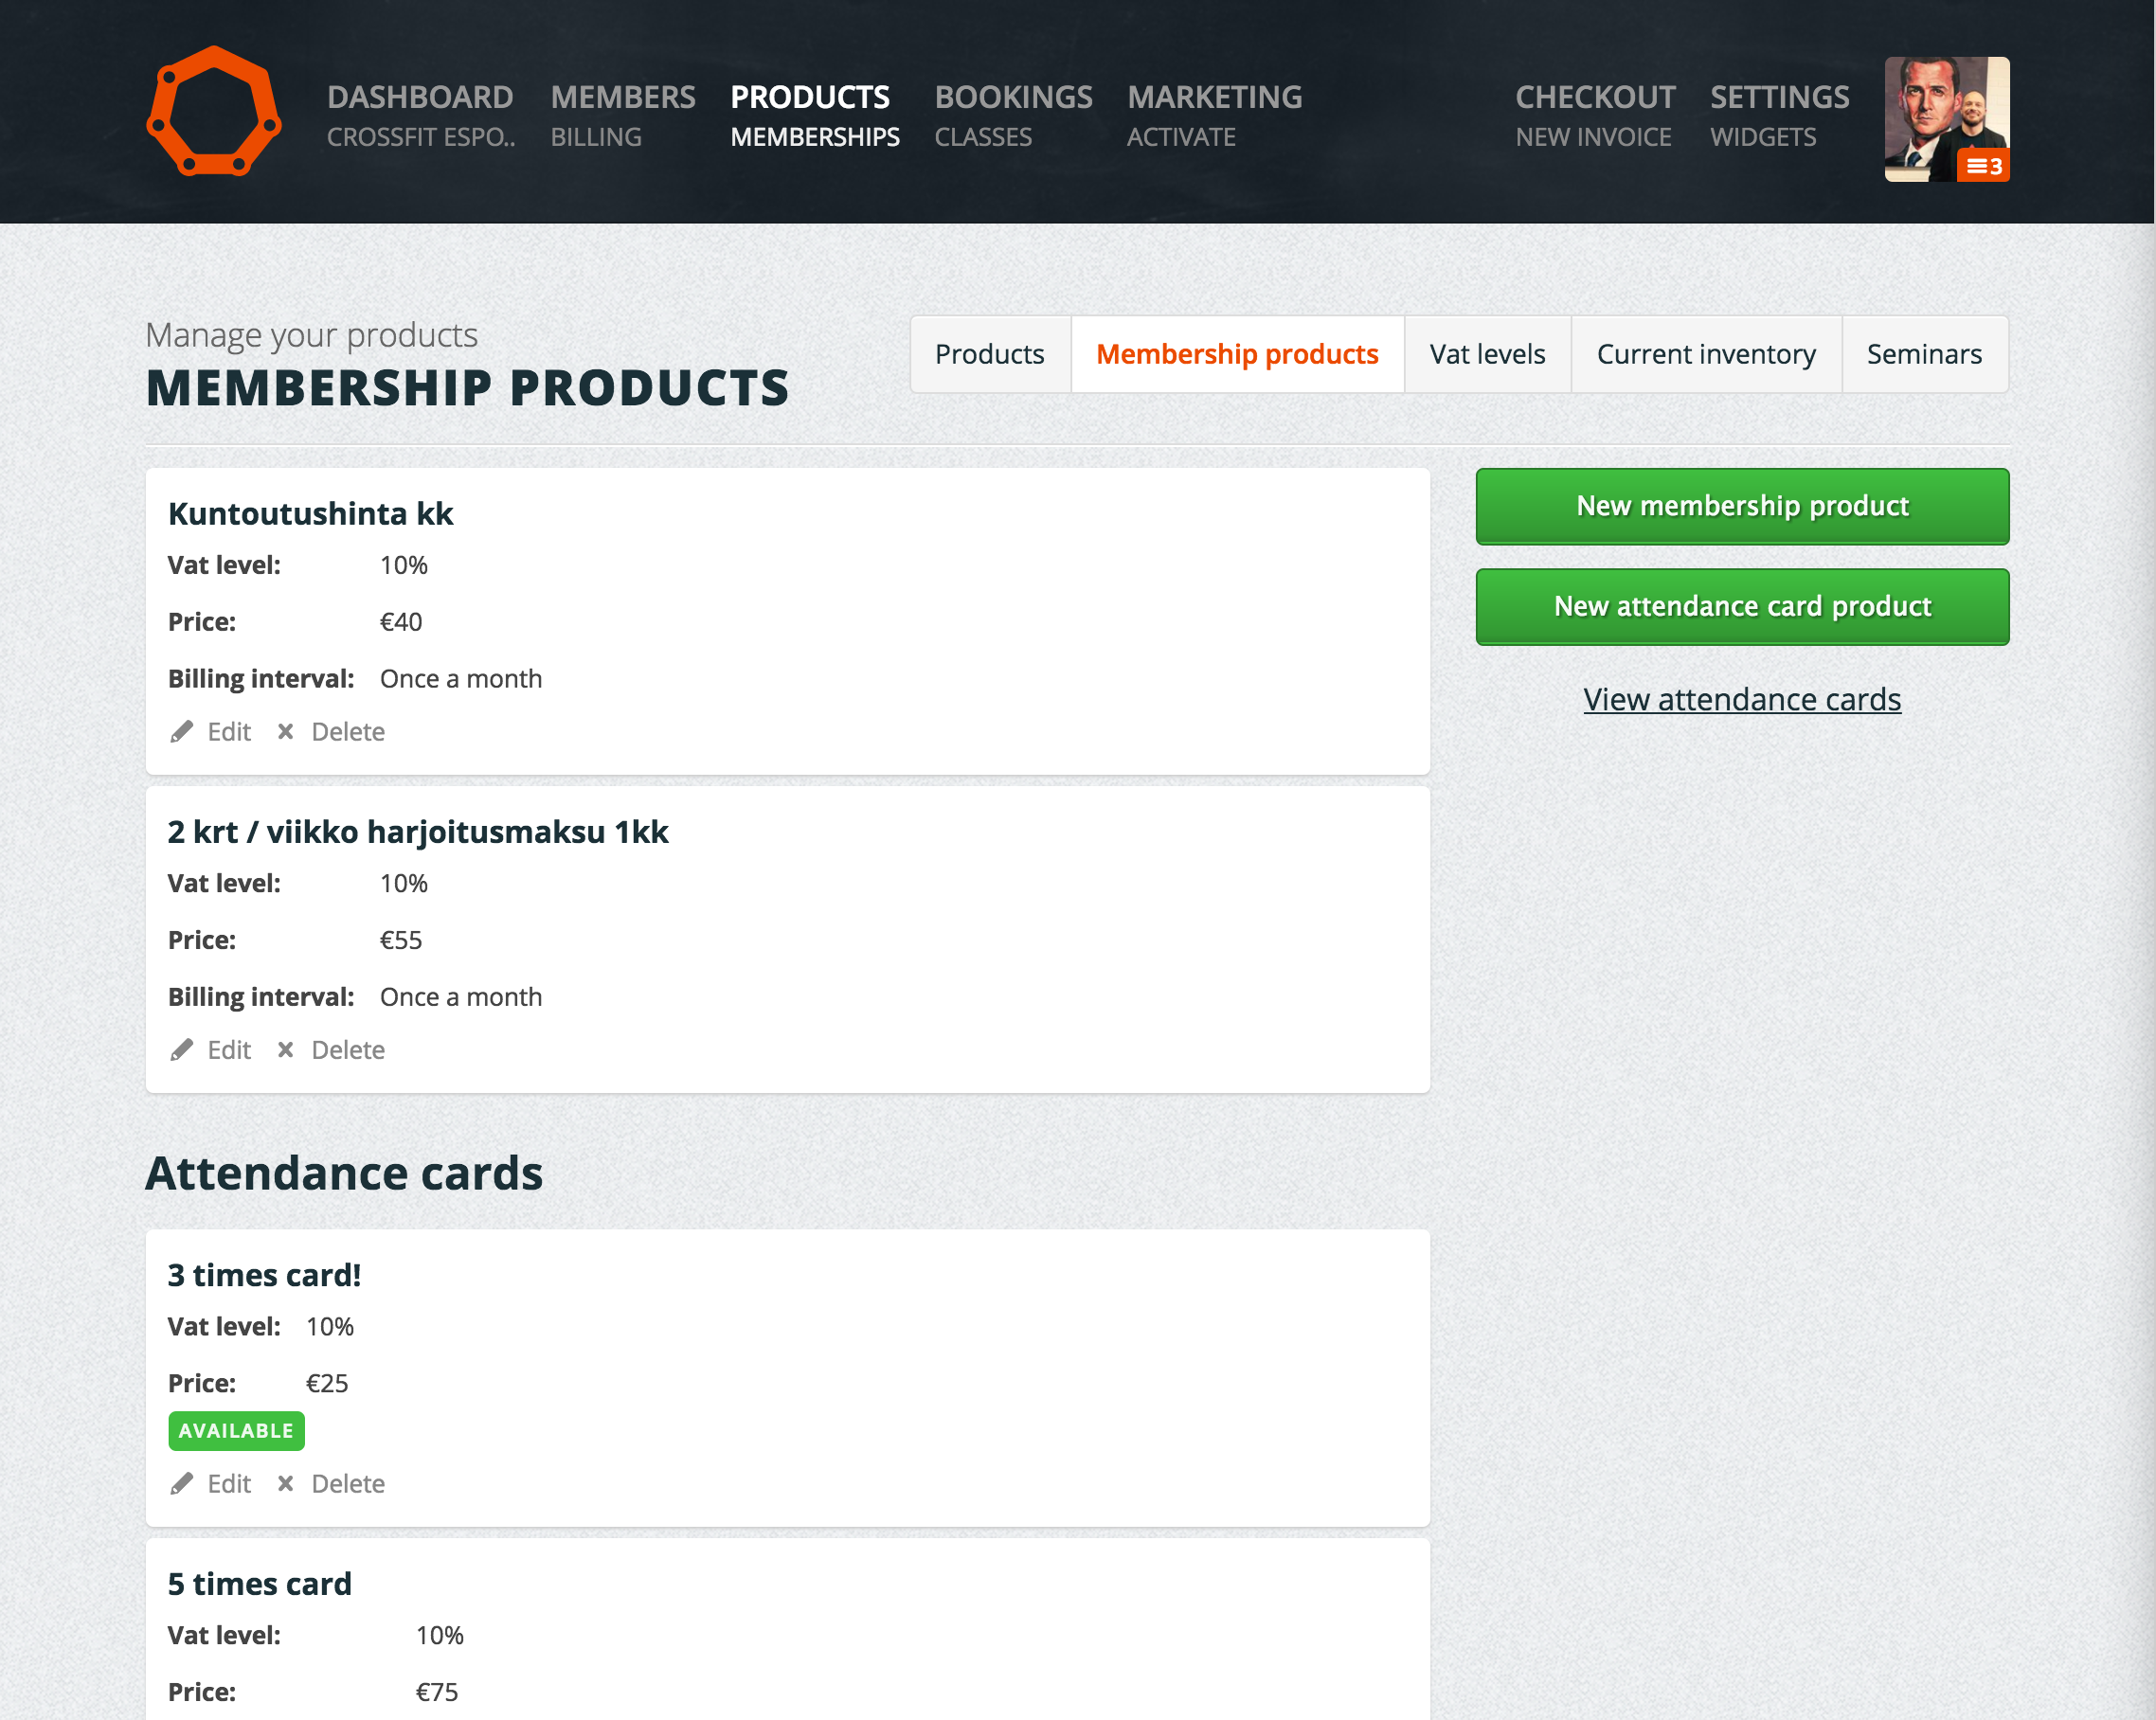
The attendance cards can be created by the affiliate owner, under the Membership products page.
You can find the attendance card products you’ve created at the bottom of the same page.
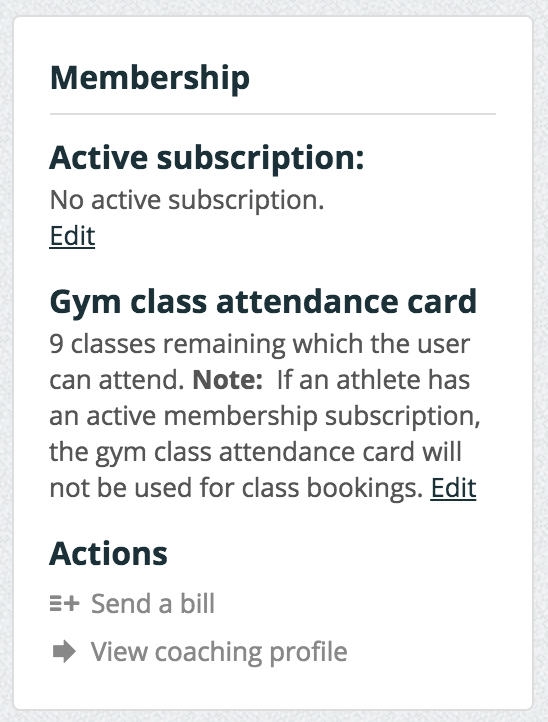
As an affiliate owner, you can make changes to a customer’s attendance card on their member’s page.
Selling attendance cards
You sell attendance cards via the checkout interface

Using attendance cards
If, as a customer, you purchase an attendance card, you can book a spot in a gym class if you don’t have an active subscription and if the gym class requires that the people booking a place have a paid membership.
If you have purchased an attendance card and haven’t fully used it, but then decide to pay for an active subscription to that particular gym, you’ll be able to book gym classes without losing any of the times left on the attendance card as long as your subscription is active. If you’ve used an attendance card to book a gym class but then decide to cancel your booking, you won’t lose any of the usages on your attendance card.
You can view the amount of times you have left on your attendance card on your Settings page, under the Gyms section.
Statistics
Under “Marketing” you’ll find a section called “Attendance cards users”. That view will show you all members that have purchased an attendance card and how many times they have left to use. You can also select members from this view and send them a newsletter.
3.5.6 Drop-in payments
Allowing drop-in payments for classes is enabled by first creating a drop-in product under Products > Membership products. When the product is created you can choose the drop-in product for each class you want to allow drop-ins. If no drop-in product is chosen, drop-in is not allowed. If class is canceled, the payment needs to be manually given back (depending on your gym rules). Drop-in option is only shown to customers that have no membership.
3.5.7 Using tags
Adding tags to gym classes allows athletes to filter different types of classes per page. This is useful, if there are many classes per day. A tag could be for example class type or a location. If class has multiple tags, they need to be separated with comma (example: “mobility, weightlifting area”).
3.5.8 Booking requirement
In gym settings you can turn on “ALLOW ATHLETES TO BOOK ONLY IF REQUIREMENT IS MET (CAN BE SET IN CUSTOMER PROFILE)” setting. When turned on, customers can book their classes ONLY if “Booking requirement met” checkbox is ticked on in their profile.
This can be used in situations where you require something from all of your customers (like a certificate of on ramp course, photo, etc.).
3.6 Seminars
WODconnect is also a tool for managing different kind of gym-related events. We call these events seminars. Most frequently organized seminars are on ramp courses, but seminars can be anything from an olympic weightlifting course to a nutrition seminar. The seminar tool is available for our billing customers, and is found in the ‘products’ section of your gym admin dropdown.
The participant has to pay the seminar bill before the participation is secured. This way you never have unpaid participants on your seminars. This does not apply for free seminars.
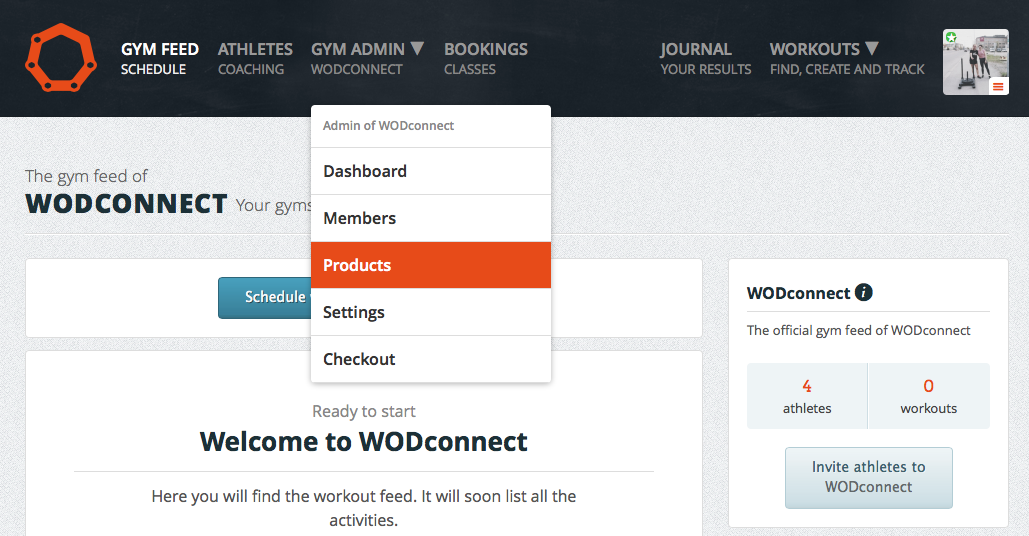
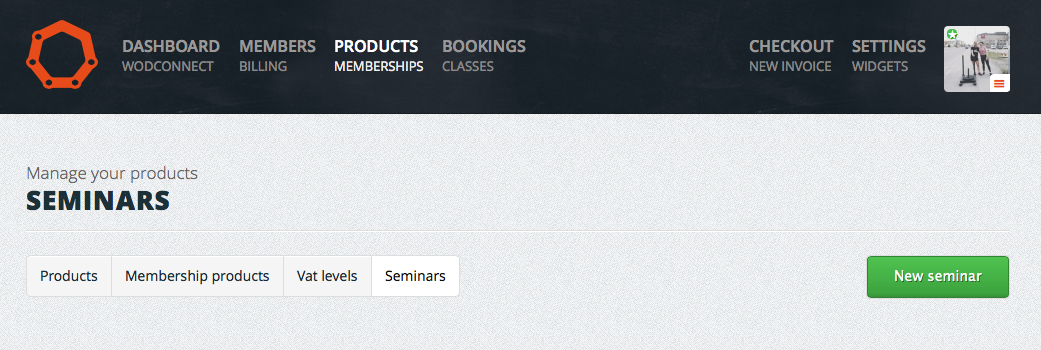
Choose the ‘seminars’ tab, and you will see all your seminar products. When you want to create a new seminar, click the green button.
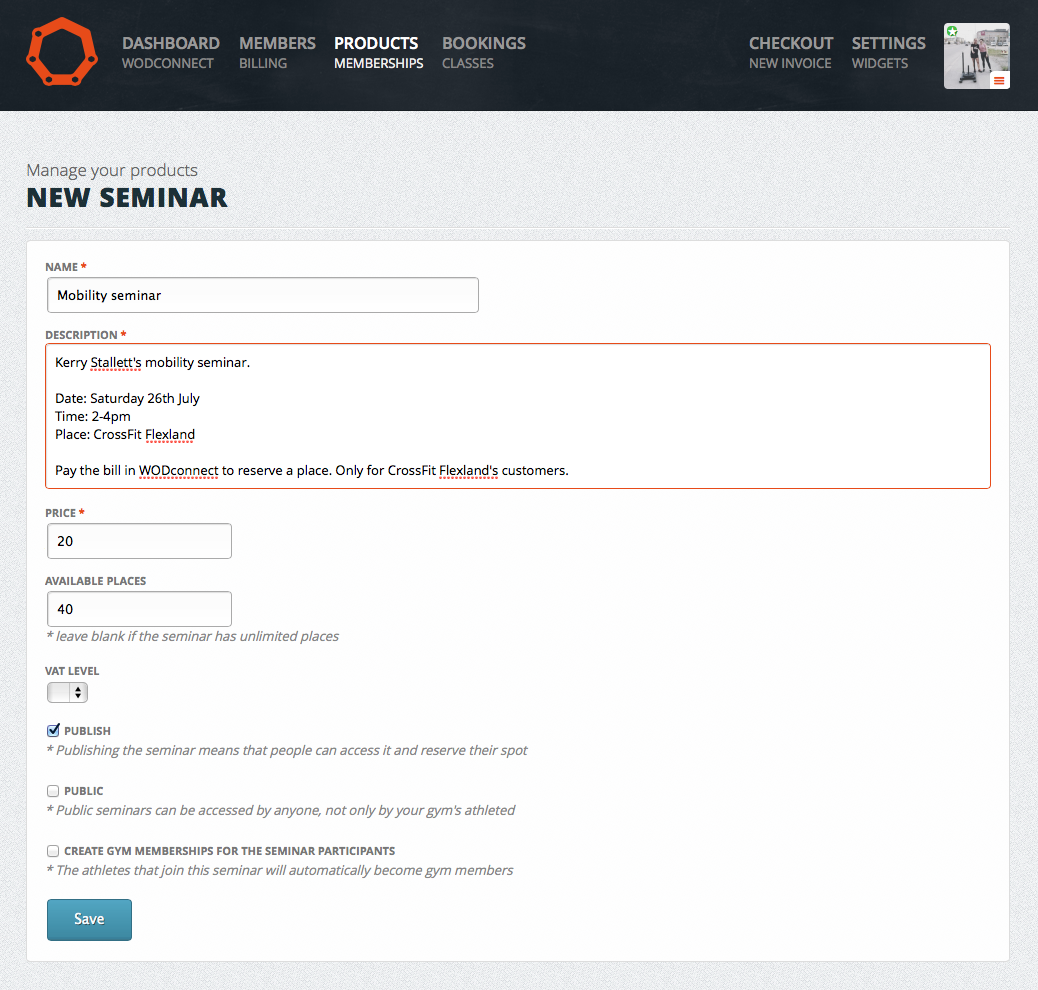
When creating a seminar, you can choose if you want to limit the number of places and determine the exact amount if you do. Seminars can either be public, or attended only by the members of your gym in WODconnect.
When you have saved the seminar, you will see it in your seminars list. Opening it will show you all the needed information.
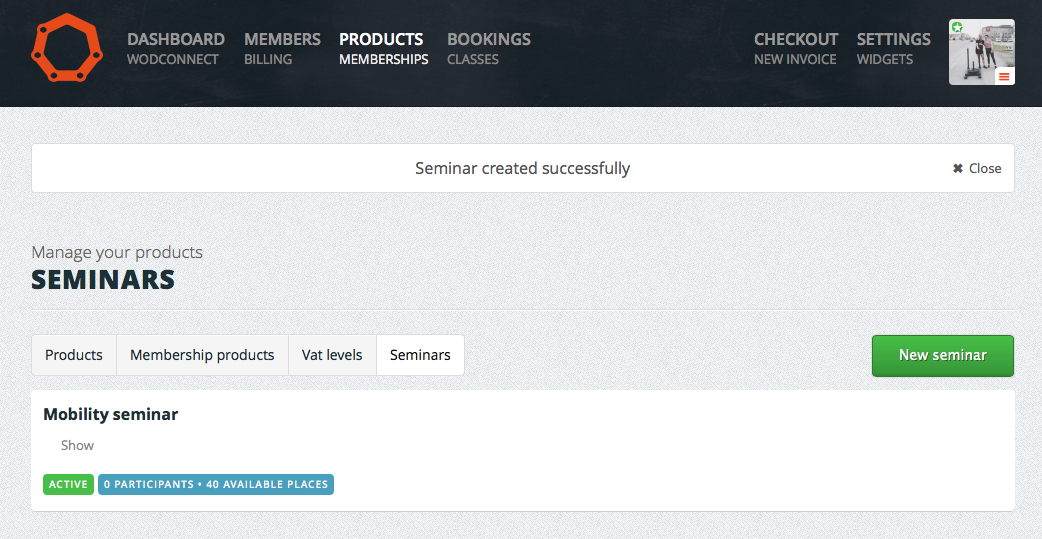
You will see a list of participants and their emails, which you can download as an excel or csv file. Publish the seminar by spreading the url marked in the seminar’s informations. You can also use the seminars widget to promote it on different sites.
3.6.1 Allowing multiple seminar purchases
In seminar settings you can allow multiple seminar purchases by checking “Allow multiple purchases”. This setting lets users to purchases more than one spot to a seminar. If multiple purchases are allowed, there is an extra column in the reports to show how many spots participant paid.
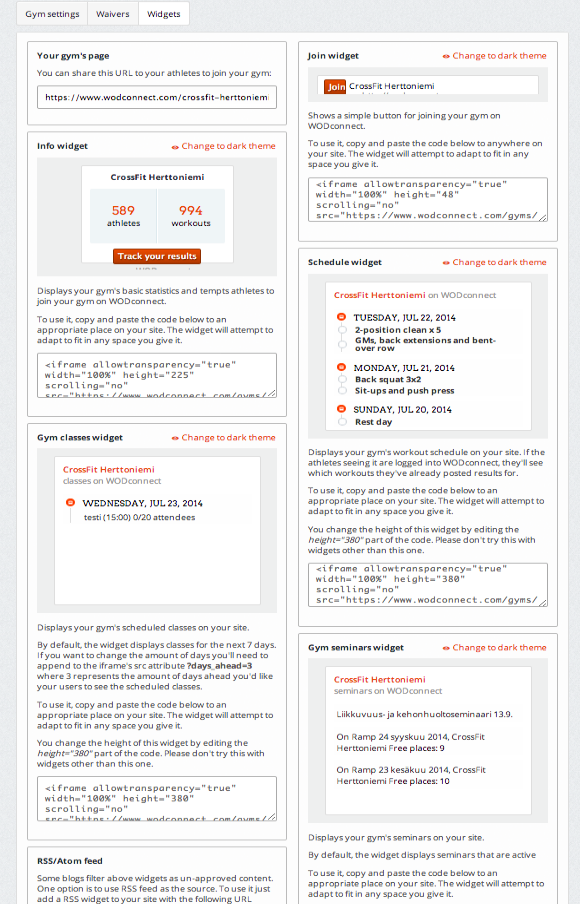
3.7 Widgets
WODconnect provides different kind of widgets to put on your other sites to promote your gym and your offerings. All widgets are found in your gym settings’ ‘widgets’ tab.
The Info and Join widgets are good ways to get your athletes to join your gym in WODconnect. More athletes means more benefits for your gym.
Classes and seminars can easily be published on your gym website using the seminars widget. Go to your gym settings, then ‘widgets’ and copy the given code to your site. You can choose if you want the theme to be dark or light. There are RSS-feeds for both seminars and classes in order to support more customisation.
3.8 Billing system
The biggest advantage of our billing system is that it will save a lot of your time. Membership subscriptions will be billed automatically, so you will never miss to bill someone again. You will also get real time visibility to payments whenever you need to check paid and unpaid bills. You will also know when exactly bills have been paid. All accounting reports will be generated in WODconnect without any paperwork. In case you are using our class booking system, having the billing will give you the possibility to allow only paid members to book classes. Also your members will be satisfied, as the payments are very easy to handle, and the notifications will help them to pay their bills on time. They will get a bill once a month, where they will see all their purchases specified. Bills can also be sent right away if needed, and memberships can also be billed every 1, 3, 6, or 12 months. They will get a notification about the bill in WODconnect and their email, then pay it by credit card or through online banking. Everything can be paid with cash straight at the gym, and vouchers can be used in case of memberships and seminars.
3.8.1 Products & services
We like to divide billable products in three groups:
- membership subscriptions
- individual purchases
- seminars
Membership subscriptions recur automatically every 1, 3, 6 or 12 months depending of the user-specific settings. By individual purchases we mean t-shirts, supplements, training gear and all other products that you ever want to sell at your gym.
Seminars include all on ramps, training sessions and events that you want to bill separately from membership subscriptions.
When organising seminars, participants will reserve their places by making the payment - you’ll just have to publish the seminar in WODconnect and share the link. To promote your seminars, you can also publish all your current ones on your gym website by using the seminars widget. For every event and seminar, WODconnect will make a useful list of all the participants and their emails.
3.8.2 Handling bills
3.8.2.1 Cash and vouchers
When a customer pays with cash or a voucher, the outgoing or sent bill is opened, and the method of payment is marked in the “settlement” field. The bill is saved and the customer pays the rest of the price. If the whole amount is paid with cash or a voucher, the bill is marked as paid. Bills paid with cash or vouchers are shown separately in your accounting reports.
3.8.2.2 Discounts
There are two ways to handle discounts. If it is a permanent discount, for example a 20% discount of a months membership, the wisest thing is to create a new membership product with that discount. In that case the bill is handled normally. In case it is a one time discount, the price is edited in that specific bill.
3.8.2.3 Cancelling a bill
Cancelling a bill is simple. The bill is opened and removed by clicking “remove”. Just confirm, and the bill will be deleted.
3.8.2.4 Pausing a membership
If the pause in membership is known, the best way is to change the billed until date. If the pause is under a month, the best way is to give discount in the next bill.
3.8.2.5 Starting membership in middle of month
When a member joins mid month (for example 15th), it should be handled so that for that month a discounted bill is sent (product through checkout view) and membership subscription is set to start from next month. For longer membership subscriptions the better way is to just give a discount (for example for 3 month subscription, you’d give 12.5% discount).
3.8.3 Billing reports
You will get accounting reports straight from WODconnect, which decreases the amount of paperwork significantly. Just send the reports to the accountant monthly, or give your accountant direct access to the information in WODconnect.
You can choose to have your sales and compensation reports as excel files with total sums – this will save lots of time and money. Accountants can also browse deleted bills by month and get unpaid bills reports (http://blog.wodconnect.com/post/85106591262/making-accountants-happy) of a chosen periods. This is possible with bills removed or due after April 29, 2014.
3.8.4 Countries & payment providers
Paypal and credit card payments work everywhere, and other payment methods are provided through different partners depending of country. Some of the countries use Adyen payments, of which you can learn here: https://www.adyen.com/home/payment-network/payment-methods. Contact us for more details on country specific payment information.
3.8.5 Starting
In your gym admin view in WODconnect, click “enable billing” from the navigation. You will be guided to send us a message from the system, where you can just write that you are interested to start using the billing system. We will then contact you and give you further information.
That’s it! We hope this answers your top questions about the billing system. If you need help in any case regarding WODconnect, contact us at buddy@wodconnect.com.
The price consists of two fees:
- WODconnect charges 1,50€ + VAT (or $1.5 dollars for US) per bill sent to a customer
- The payment provider price depends of your contract with them (1-5% of bill depending on provider)
Note that our class booking system is free for all our billing customers.
3.8.6 Self-purchase for athletes
Demo how self-purchase works for athletes: here
Now gym’s can offer an easy way for their members to mark purchased products themselves. This feature replaces the notebook that most of the CF boxes use. To setup self-purchase for your gym:
- Go to your gym settings, check “Allow athletes to self-purchase products that have been marked as self-purchasable”and save settings
- Go to your Products and enable self-purchase for the products you want (edit product, check “Can be self-purchased”, save)
Tell your members about this in social media and at your gym. You can use the video above and the text below, if you want.
For athletes self-purchase is really easy and fast:
- Click the shopping cart icon from your gym’s feed
- Input the products and amounts you purchased
- Click Accept
- You will be billed for your purchase in next billing cycle
3.8.7 Membership Breaks
Overview
Membership Breaks is a feature that allows gym owners to pause member subscriptions for specified periods. When a break is applied, the system automatically adjusts billing to reflect the pause period, saving time and maintaining accurate financial records.
Key Features
- Create, edit, and remove membership breaks
- Automatic price adjustments in billing
- Break periods visible in member management
- Flexible date range selection
How to Use Membership Breaks
Creating a New Break

- Navigate to the member’s profile
- Click on the “Membership Break” tab
- Click “New Membership Break”
- Set the following required information:
- Start Date: When the membership pause begins
- End Date: When the membership pause ends
- Click “Save” to apply the break
Managing Existing Breaks
- View all breaks in the Membership Break tab
- Use the “Edit” button to modify dates of upcoming breaks
- Use the “Remove” button to delete breaks that haven’t been processed in billing
Billing Impact
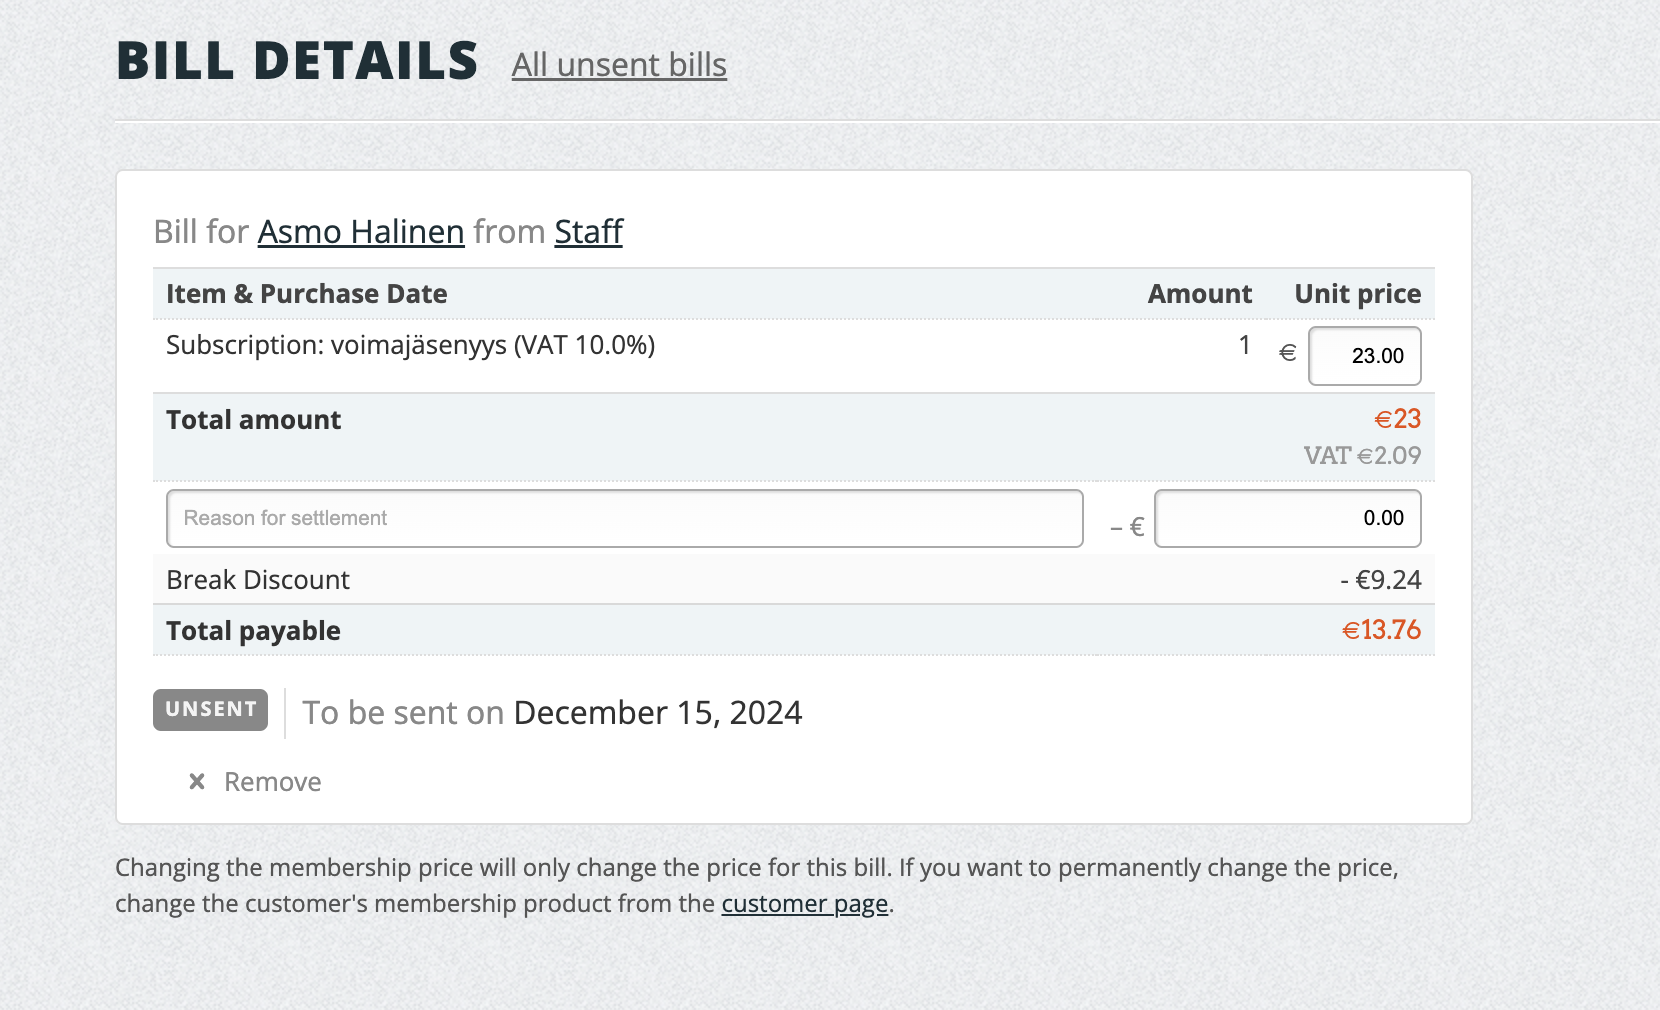
- Break periods automatically reduce the membership fee proportionally
- The discount appears as “Break Discount” on bills
- Discount calculation: Daily rate = Monthly price for membership / 30
- Break discount = Daily rate × number of break days
Important Notes
- Once a break has been processed in billing (deducted_from_billing = true), it cannot be edited or removed
- Break periods may not overlap
- The system counts unique dates when calculating break discounts
- Breaks only affect future bills, not past billing
Limitations
- Breaks can only be set for active memberships
- The minimum break duration is one day
Best Practices
- Set breaks as soon as members request them
- Verify break dates before saving
- Review upcoming bills to confirm correct break discounts
- Communicate break policies clearly to members